

do it yourself projects?
I stumbled across a great free website that easily
enlarges images for you. It was featured by Karen at
The Graphics Factory blog in 2011 so lots of folks
probably already know about The Block Poster website
but this was new info to me and maybe it is to you too.
For St. Patrick's Day decor in my dining room, I had been
planning on making a faux stained glass window depicting
Saint Patrick, himself. I was dreading trying to draw the
stained glass window (that I found a picture of online to copy)
to be large enough to fit in the frame needing a new subject.

Church in West Orange, New Jersey.
It depicts Saint Patrick, the patron saint of Ireland.
Historians think that Patrick preached the Christian
gospel to the people of Ireland in the 5th Century.
At that time, many Irish were pagan or Druid worshippers.
gospel to the people of Ireland in the 5th Century.
At that time, many Irish were pagan or Druid worshippers.
Patrick taught the theology of God being the Father,
the Son and the Holy Spirit using the three leaves of the
shamrock, a familiar plant to the Irish, as a visual example.
the Son and the Holy Spirit using the three leaves of the
shamrock, a familiar plant to the Irish, as a visual example.

Using Block Poster it was very easy to make St. Patrick larger
(and I'm a computer dummy).

In Step 1 you upload your image to their website.
(and I'm a computer dummy).

In Step 1 you upload your image to their website.
Tell the program if you want the image to be "portrait"
(or vertical) or "landscape" (or horizontal).

In Step 2 you determine how large you want your final image
to be. The website calls them "slices" but for me it was easier
to be. The website calls them "slices" but for me it was easier
to think of them as 8.5" x 11" pieces of copy paper because
that's how the image will be "delivered" to you on your printer.

At first, I tried 4 "slices" across but in doing the math,
that would have made my image 34" wide and the frame
is only 24" wide. It was easy to adjust the "slices" to be
3 across. That way my image would fit in the frame and
I could just add something to the sides to fill it out.
The program does tell you the approximate size
your image will be after it is pieced together.

The program does tell you the approximate size
your image will be after it is pieced together.

In Step 3 the larger image is downloaded back to you and
your printer gets to work printing out the image page by page.

I only wanted the image to use as a guide so I printed
it on the laser printer in black and white and not on
the color printer but you can print your image in color.

your printer gets to work printing out the image page by page.

I only wanted the image to use as a guide so I printed
it on the laser printer in black and white and not on
the color printer but you can print your image in color.

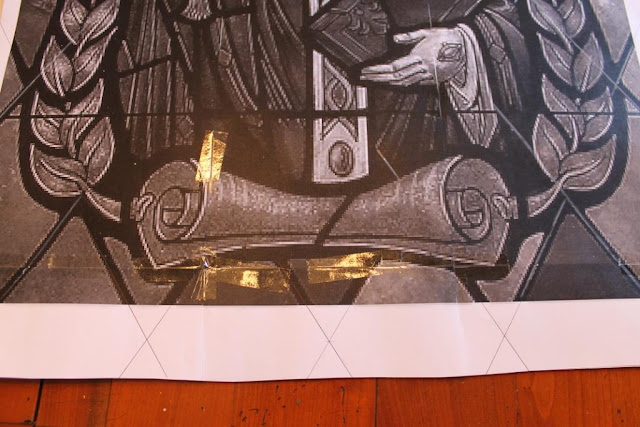
The image prints out with white borders so you will
need to cut those off and tape the pieces of paper
together (if your image is larger than 8.5" x 11").
Here is the image with the horizontal borders cut off...

...and with all the interior borders cut off... making sure
the image will fit on the acrylic in the frame I purchased.

Here is the image with the horizontal borders cut off...

the image will fit on the acrylic in the frame I purchased.

For a base for the actual "stained glass" I thought that plastic
would be lighter to work with than a sheet of real glass.
A home improvement store did have some acrylic sheets
that could be cut to size but I was shocked at the prices.
A cheaper alternative was a poster frame on sale at
Michael's. It was only $12.50 and already the correct size.


The only part of the frame that I was going to use was the
acrylic sheet. You could put a faux stained glass project back
into the original framing pieces but you would have to be careful
not to let too much paint come to the edge of the acrylic so the
black rails could still fit on top and hold everything together.
black rails could still fit on top and hold everything together.

Making sure the acrylic does in fact fit in the frame I have:

pull it off the side you will be putting the paint on.
"It's a sign." I love that quote from "Sleepless In Seattle".
I took it as a good "sign" that I found a piece of paper in a
box that had been mailed to me that was the perfect size
of the frame's interior (and of the acrylic sheet).

I needed that paper to extend the lines of the stained glass
because my image was a little smaller than I actually needed.
because my image was a little smaller than I actually needed.

To simplify the design some, I decided not to do the
intricate stained glass pieces around
St. Patrick's head (red in the original image).
To take their place, I just extended the diamond shapes
to go behind him. I used a white crayon to draw those lines
on the dark parts of the image so I could see them easily.

For my purposes, the image was taped under the acrylic
to more or less trace it with the black leading paint.
If you are using the Block Poster image to transfer wording, etc.
onto a piece of wood or paper, you would place the image on top
and use some type of carbon paper to trace over the image.

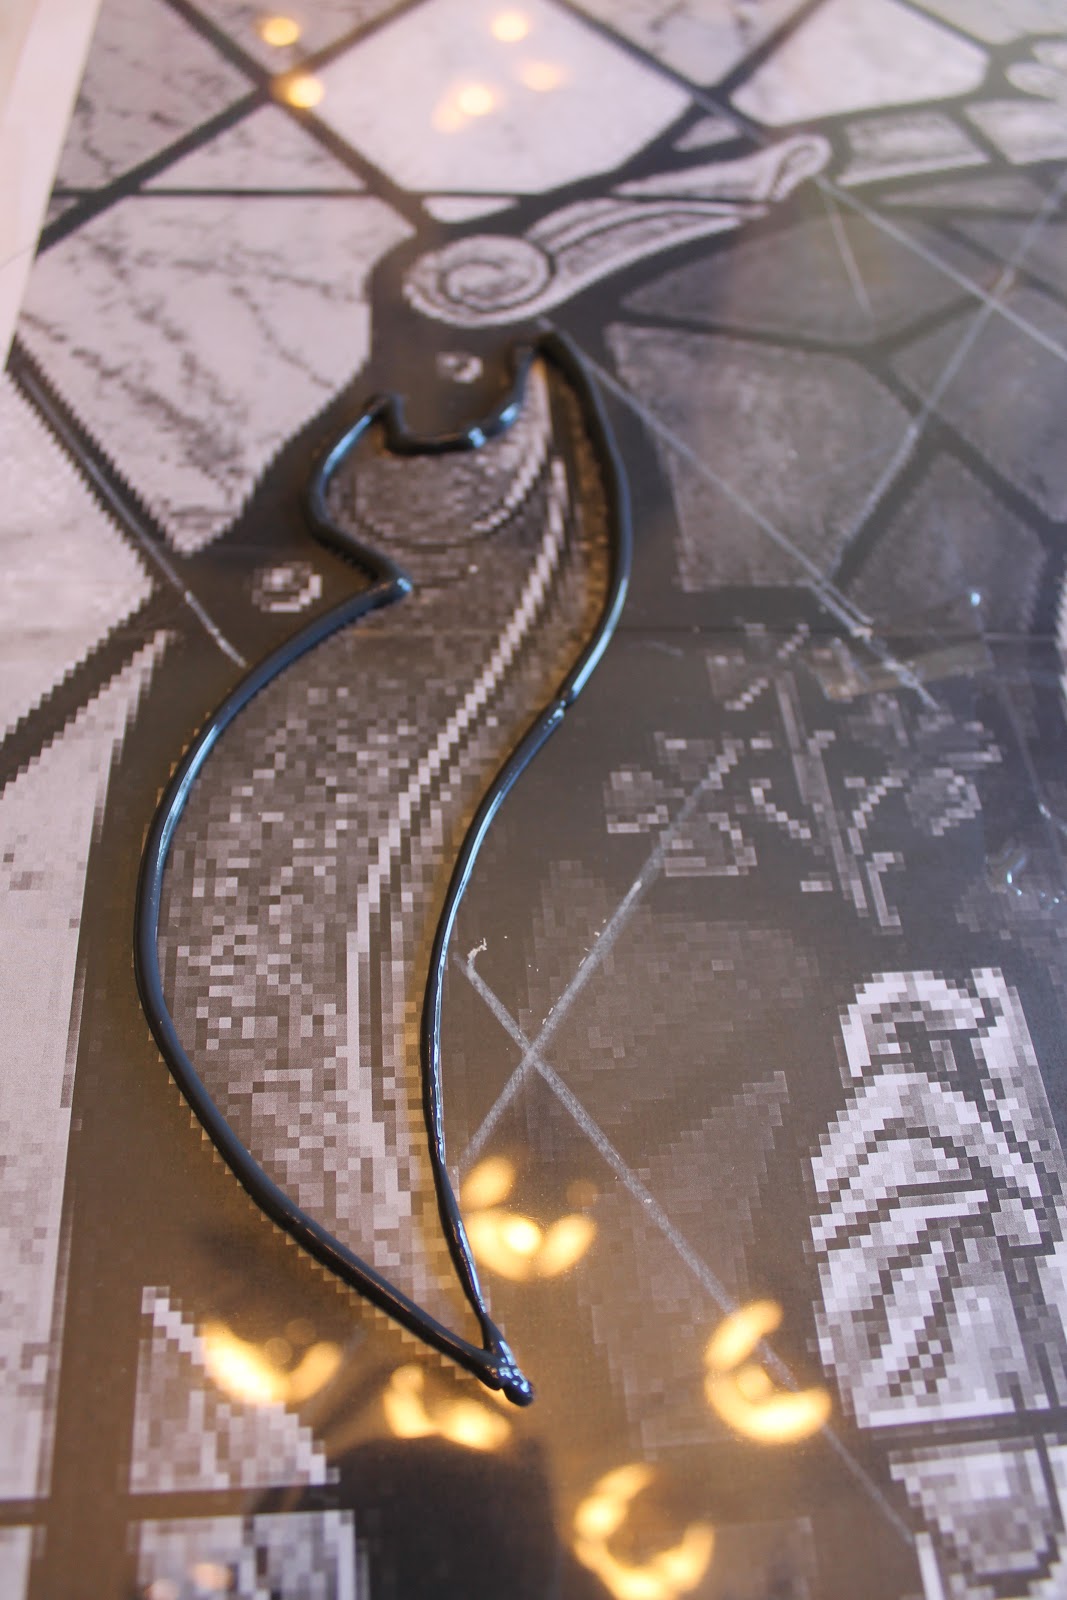
The first step in the faux stained glass process is to draw
the faux leading lines with the special paint.
I thought I was being careful not to cut too much off of
the tip of the paint bottle but I did anyway. The paint came out
thicker than I wanted it...let that be a lesson to you.

Anyway, just trace over the different elements of the main
parts of the design with the liquid leading. It needs to dry
before you start adding the fill colors.
I thought I was taking good pictures of the whole painting
process but from this point on but the memory card was out
of my camera! That's OK...I don't know what I'm doing
anyway...it was trial and error. There are good tutorials on
faux stained glass painting online for you. In retrospect, here
is a photo of the paints that I did use in the project:

Gallery Glass paints are available at most craft stores.
The Martha Stewart craft paint line came out with a paint
called "liquid fill" last Fall which worked really well for
the project too. It is thinner than the Gallery Glass paints
so it fills in a area easily but another type of MS paint
would probably be better if you are working on a vertical
surface. The "fill" paint needs boundaries unless you want
it to completely cover a surface.
Also pictured with the paints above is a paint pen.
This was used to mimick the smaller lines in the original
stained glass piece that were not leaded (like the eyes, etc.)
Now that the memory card is back in the camera,
here's a photo of the (mostly) finished project:
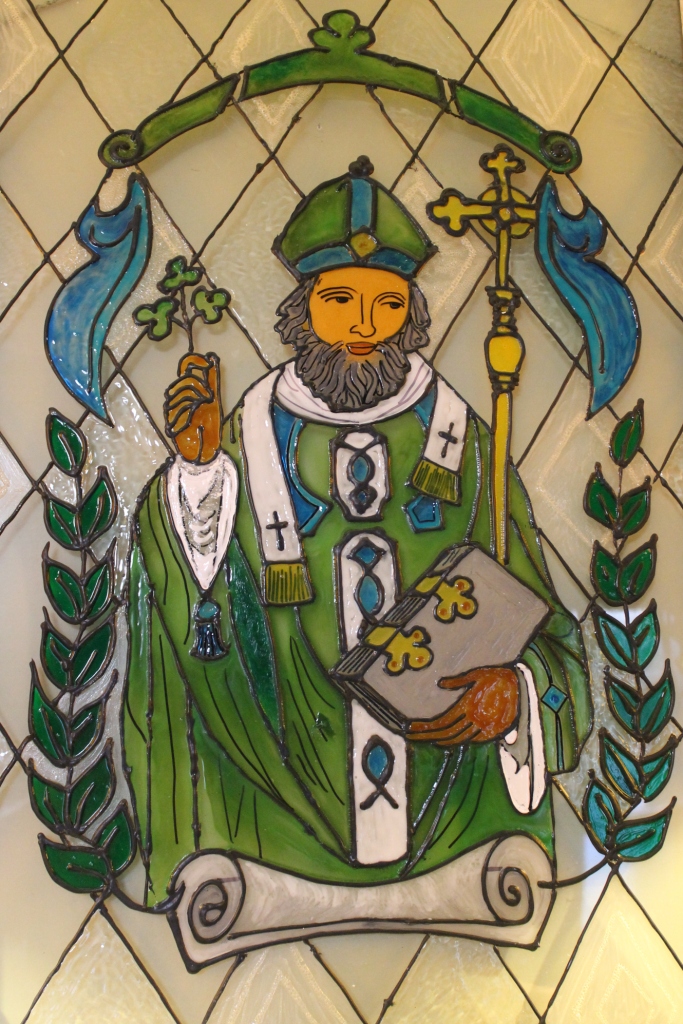
Some of the colors were changed from the original.
I still have not finished St. Patrick's face. The flesh tone
paint that I used on his hands looks at little too much like a
tan from a bottle so I put it only lightly on his face.
It looks OK when there is something white behind him but
he is going to be on a green wall and then his face looks green.

For the time being, I cut out a piece of orange vellum to
put behind his face until I can learn how to give him good color.

Before I put St. Patrick in the heavy frame, I held him
up to a sunny window to see what he would look like if he
was really being used like a stained glass window.

My favorite places on the window were areas where two
shades of a color were marbleized together.


St. Patrick got secured in the frame with black electrical tape.
I thought that if any of it showed, it would look like leading.

Here he is on the wall:

I painted the hanging wires green but I didn't paint
them light enough not to show...need to fix that.


I learned a lot about enlarging an image and making faux
stained glass for this St. Patrick's Day project and will try
both processes again sometime.
I'm sharing this post over at
Flaunt It Friday @ Chic On A Shoestring
Inspire Me Please @ Liz Marie Blog
Feathered Nest Friday @ French Country Cottage
Be Inspired! @ Common Ground
What's Shakn' Link Party @ Shaken Together
Weekend Bloggy Reading @ Serenity Now
Sunday Showcase Party @ Under The Table and Dreaming
Metamorphosis Monday @ Between Naps On The Porch
Tabletop Tuesday @ A Stroll Thru Life
Wow Us Wednesday @ Savvy Southern Style


That is gosh darn amazing!
ReplyDeleteThanks so much for this great tip. I've always wondered how to enlarge something. I'm sure that I'll use this for bunches of projects.
ReplyDeleteYour lovely "stain glass" St Patrick project is more of the feature here. It seems like it was so intricate to do and the results simply fabulous! Don't know how you had the patience to do this but was well worth it. The first time I used block poster I did a tree and it was like a puzzle to put together. The way you laid out your picture seems so much easier. Thanks for sharing.
ReplyDeleteWhat a phenomenal piece of work you did there, Gayle. I just love it. I had never heard of this site before today for enlarging like that. You are the second one today to use their graphic enlargement. GREAT job!!!! xo Diana
ReplyDeleteThis is fabulous, Gayle! It turned out gorgeous. I've never heard of the site to enlarge prints.
ReplyDeleteI loved your 50 shades of white too!
You are amazing!!!! I just know I would never be able to pull this off! You did such a beautiful job! I may have to commission you to make one for me!
ReplyDeleteI'm totally in love with this project! I've been wanting to so some leading on my casement windows and this is a great way to practice it first. Pinning.
ReplyDeleteI too just did a project with that same info from graphics fairy... also, thanks for writing the paragraph about St. Patrick, I was just telling my daughter about the true meaning, but couldn't remember the details, so yours came in handy. and love your finished product! I'm pinning it. Little Bit from www.DecorateWithaLittleBit.com
ReplyDeleteStunning, LOVE it!
ReplyDeleteI would recommend my profile is important to me, I invite you to discuss this topic... udulzhavane na chlena
ReplyDelete