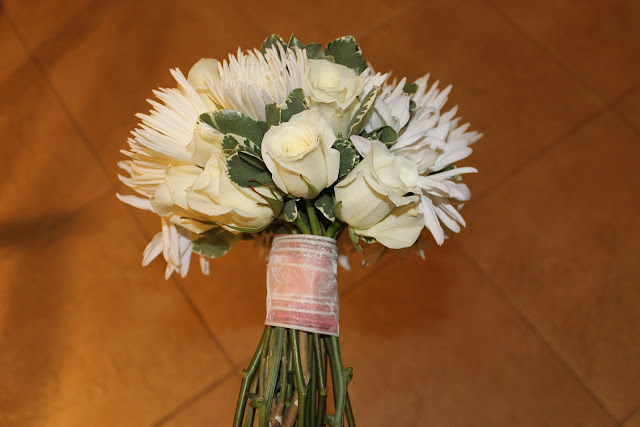
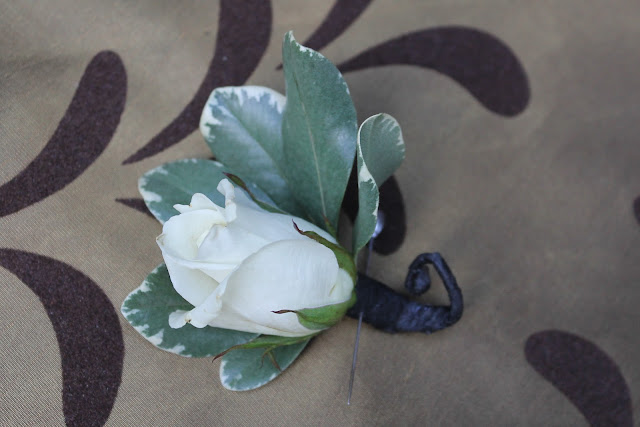
If you are {or someone you know and/or love is} having a fairly small wedding, you can save money by doing the wedding party flowers yourself.
Cut stem flowers are now not only available at florist
shops but also at most grocery stores and discount stores.
The only other things you need to make your own
bouquets and boutonnieres is floral tape,
floral wire {both available in the floral sections
of craft stores}, scissors, and greenery {optional}.
shops but also at most grocery stores and discount stores.
The only other things you need to make your own
bouquets and boutonnieres is floral tape,
floral wire {both available in the floral sections
of craft stores}, scissors, and greenery {optional}.
For a small wedding I helped with recently,
I spent about $40 for all I needed to make a bride's bouquet,
a flower girl bouquet, three small mothers' bouquets,
and two boutonnieres.
I spent about $40 for all I needed to make a bride's bouquet,
a flower girl bouquet, three small mothers' bouquets,
and two boutonnieres.
The most un-fun part of doing the bouquets is
gathering the greenery. I hope you have someplace
you can cut it for free like your yard or your neighbor's yard.
To buy it costs almost as much as the flowers.
Not to lead you in paths of unrighteousness, but keep
your eyes open for businesses with overgrown bushes
that need a little trimming and visit them very early
in the morning or at sundown a day or two
before the wedding. Of course, keep your flowers
and greenery in water after you obtain them.
You will need to edit your greenery if you are using it.
You don't have to use greenery but it helps fill out the
bouquets and you don't have to have as many flowers.
You don't have to use greenery but it helps fill out the
bouquets and you don't have to have as many flowers.
Un-edited greenery. This is varigated pitisporum.
Strip all but the top-most leaves off of the stem.
Edited greenery
The next step is not totally necessary but I like to do it in order to have more control over what the greenery will look like in the bouquet. You can pinch the leaves into a bunch and then wire or tape them together.
This makes almost a greenery "flower".
After getting your flowers and greenery ready, you are ready for the fun part...taping the stems together.
Select a really good flower to be the top of your bouquet.
Start adding one or two stems of greenery (or more flowers)
to the side of your first flower. Their tops should be
just a little lower than the first flower.
Keep them pinched together. Press the end of the floral
tape against the new stem and pinch it in your fingers also.
Stretch the tape enough to expose the stickiness and
start wrapping it around all the stems close to the
heads of the flowers. Keep it tight but not so tight as
to break the tape before you want it to.
A white rose with a greenery "flower" being taped onto its stem.
Keep adding flowers and greenery all the way around, making each layer a little bit lower and out wider than the previous layer. I usually just add one stem at a time and wrap the tape a couple of times around the previous stems.
After the new stem is secure, I break the tape before adding another stem. To me, it is easier to do that than to have the tape dangling off the bouquet waiting for the new stem.
Keep going around and around adding stems, taping stems
until you get the size bouquet that you want.
This half-round shape is easy to accomplish.
The completely round bouquet is MUCH harder to do...
you either lose a lot of flowers to broken stems or
you have to wire each flower so it will bend enough
to accomplish that shape.
You will end up with very long stems that need to be cut
to a size appropriate to the carrier's height.
To cover at least the bottom row of tape up, you need to add some ribbon. You could add just enough ribbon to cover the tape. Some people like to cover all the stems all the way down with ribbon.
To keep this look simple, I just used the ribbon about a third of the way down the stems to keep the natural look of the stems exposed {and it lets folks know that the flowers are real}.
These flowers were for a second wedding. The bride was not sure what dress she was wearing the day of the wedding so I just layered
a couple of colors of sheer ribbons to keep it rather neutral.
The flower girl's bouquet was made in the same way but smaller and with different greenery. I was unsure what color her dress was so I just used a fun sheer ribbon that I hoped would work. Hobby Lobby has their ribbon by the roll on sale at least once a month so you can watch out for the sale if you are going to be needing ribbon for a project.
The mothers/grandmother's bouquets (more like hand held corsages, really) were even smaller but done the same way and were embellished with a sheer white ribbon.
I try to get out of making the boutonniers whenever possible since to do them right, the flowers {and sometimes the greenery} has to be wired which is time-consuming. But I only had two to make so it was not a big deal.
Most of the pictures at the first of this post were taken at
night so I had to use a flash on the camera.
These next photos were the next morning taken in natural
light so they look much better.
Here are the ladies' bouquets with the bottoms of their
stems in water until closer to the time of the wedding.
The boutonniers "slept" in the refrigerator since their
stems are sealed off with tape. But they came outside
for their "glamour shot".
The bouquets came out of the vases for art-sy photos too.
You can also use the hand-tied bouquet techniques to make every day presentation flowers for a special girl or lady in your life.
They can stay out of water for a few hours and then go into a vase for someone to enjoy for days.


Great tutorial. My good friend will be going to a u-cut farm for her wedding and doing something similar. I think it is a great way to save money!
ReplyDeleteBlessings,
LaVonne @ Long Wait For Isabella