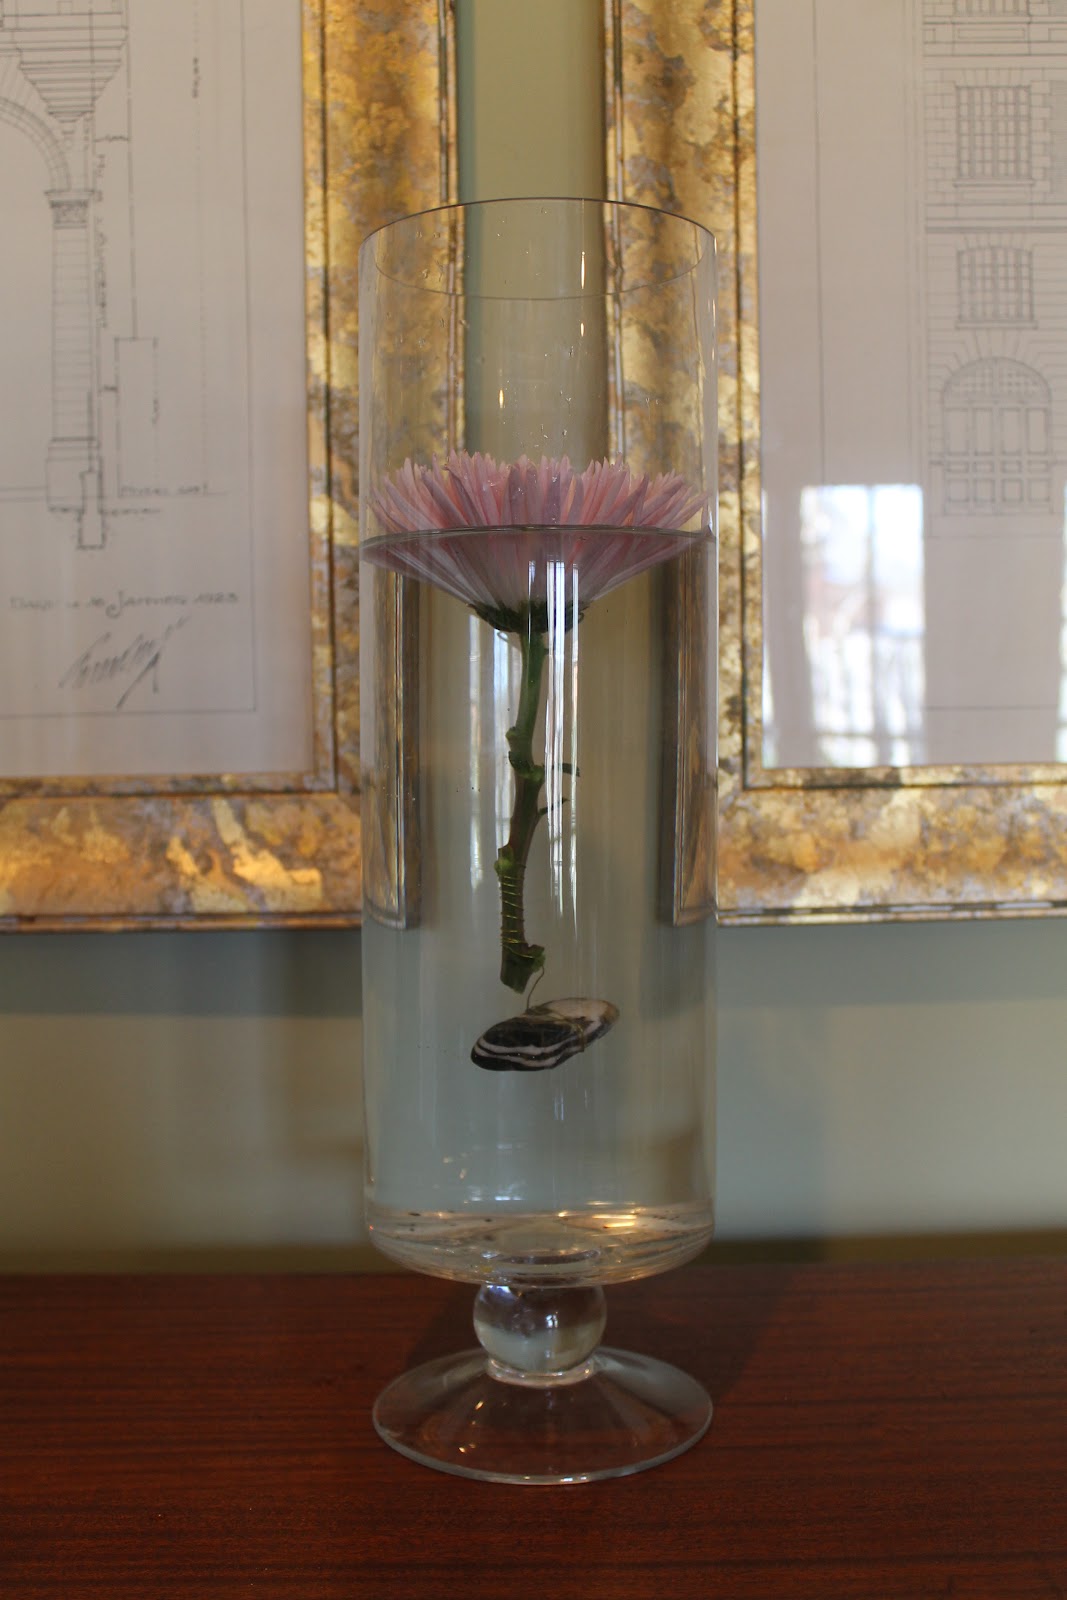
Want a different way to display your Valentine roses?
I have seen pictures of elegant dinners where the party planner/floral designer had submerged flowers
in vases but I have never seen good instructions on
how to accomplish the look.
What follows are
my attempts at sinking flowers in various vases of water.
I had heard that pet supply stores had "sinkers" to weight
aquarium plants down but I was not able to find any of
those locally. To try to make an attractive weight,
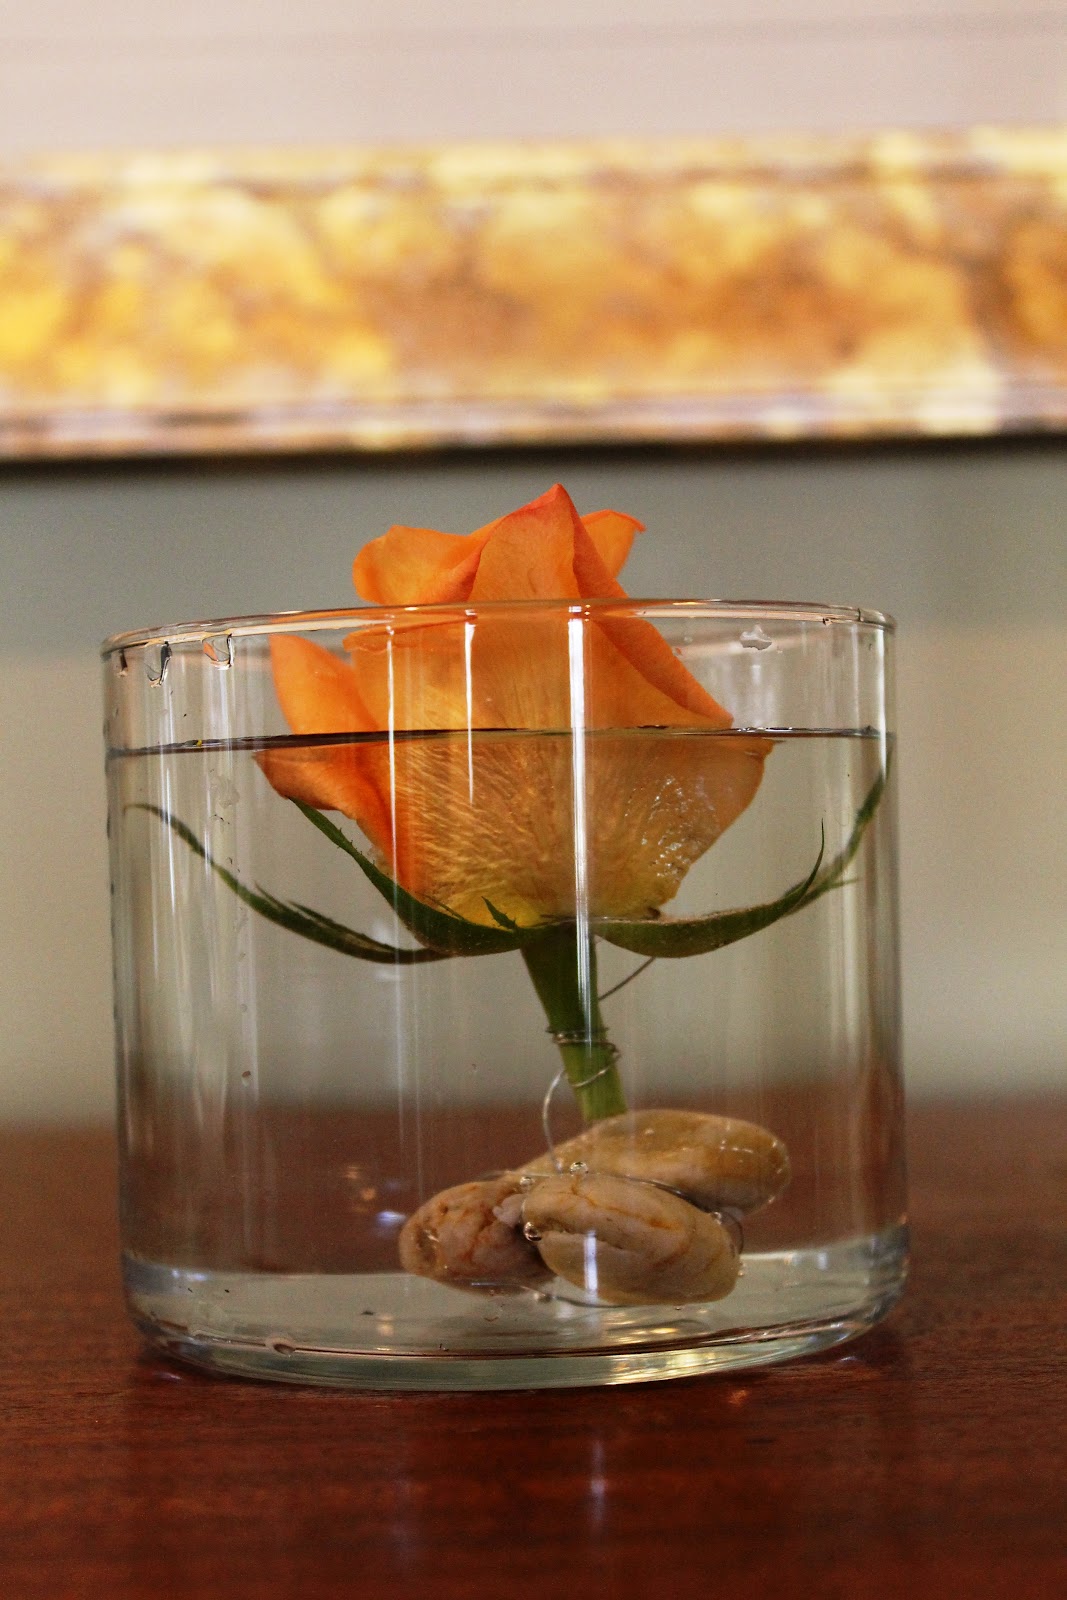
I wrapped wire around a rock but the wire kept slipping off.
I finally glued the wire on with J.B. Weld adhesive.

This adhesive works great but allow several hours or overnight for drying.
The most surprizing thing about this experiement of submerging flowers is how much weight it takes to sink the flower and keep to under water.
One Rock

Two Rocks

Three Rocks

Five Rocks
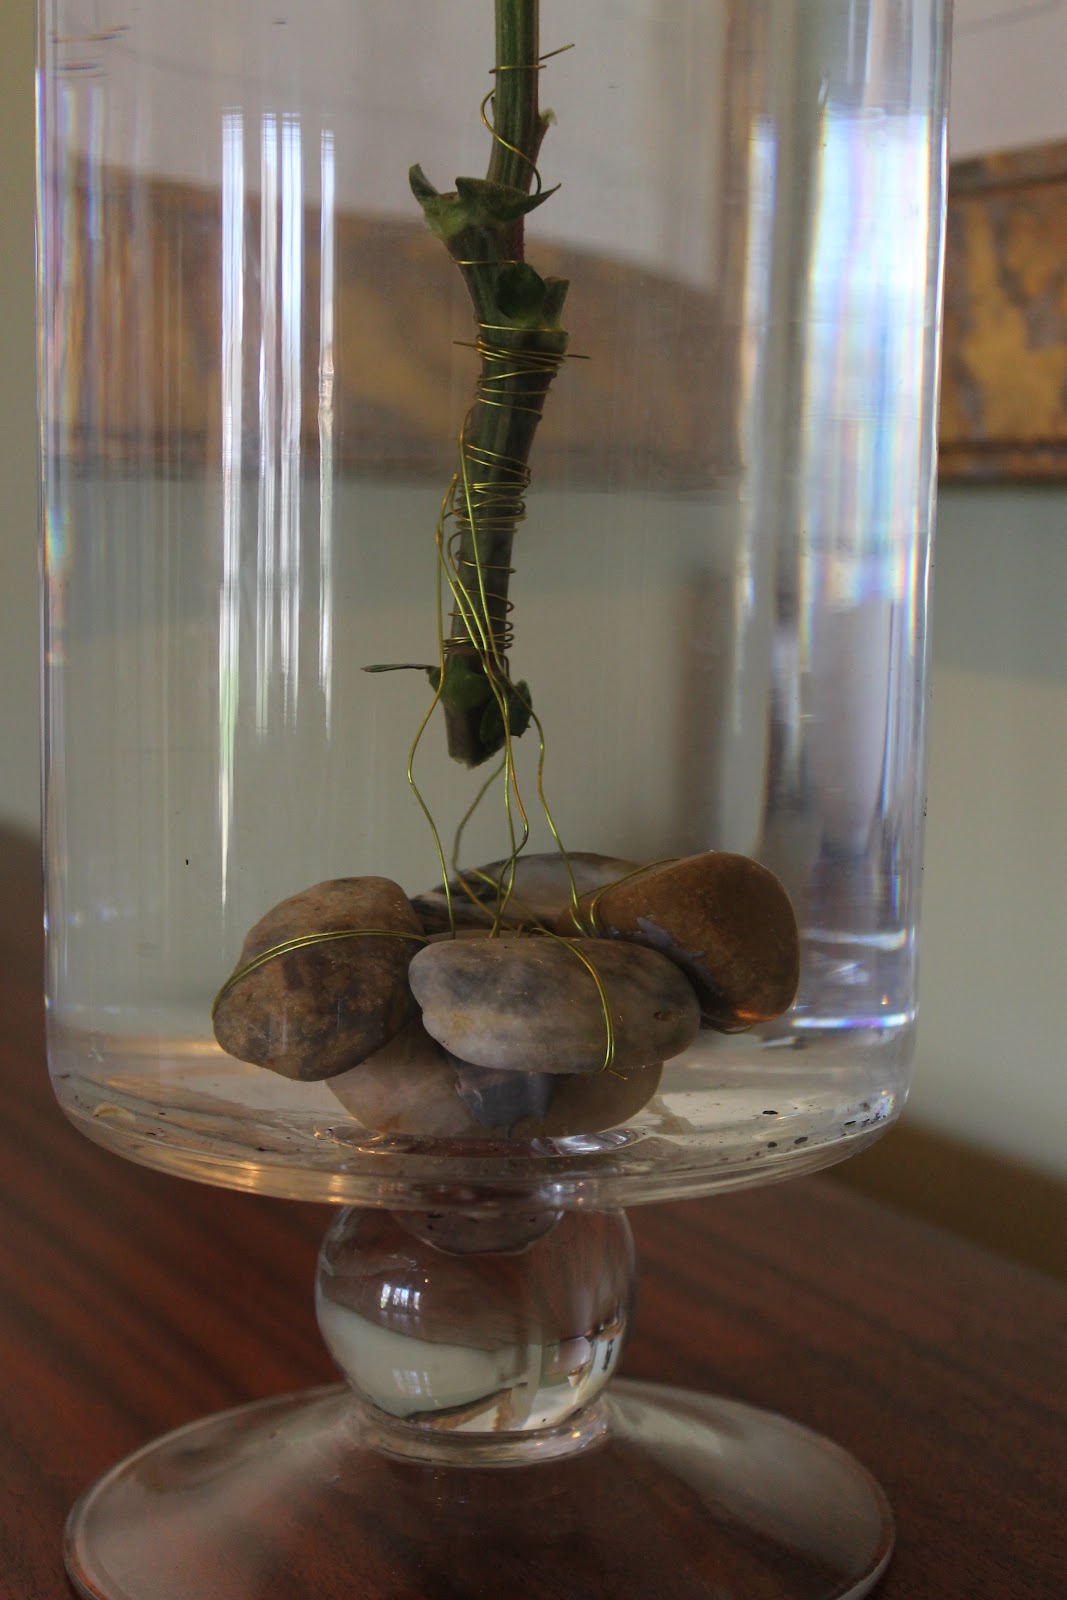
Five rocks to sink ONE Fugi mum!
I learned to be a little mean and push the flower down into the water
to help it sink. The weight of the water in its petals aids in keeping it down.
I wasn't sure I like the look of all that wire, so I had
the idea to glue several rocks together and tie a single
wire around the rock bundle to keep the flower down.

The J.B. Weld adhesive had worked well underwater
but it was grey when it dried.
Since I also wanted to try sea glass and clear pebbles as weight possibilities, I got a glue I thought was a cousin of the "weld"
but dried clear.

It was a "weatherproof" glue. I learned later that
"weatherproof" does not mean "waterproof".
I'm passing that life lesson on to you
(you might have already known that).

I'm sure this glue has good applications but underwater adhesion is not one of them.
I'm trying E-6000 glue at present to make bundles, and I think it is going to work .
Another sinker material I tried was big washers from the
hardware store.

It took three of them to sink a rose.

Attach one end of a length of wire (or clear line) to your sinker
then wind it up the stem of the flower. It helps to wind the wire past a leaf stem (or stump) to give the wire something to pull
against as the flower tries to float up. If you have a short stem,
you can wrap the wire around the base of the head of the flower.
Here is a contraption for you. Four washers wired together
with three roses wired to the washer bundle...

...and sea glass to cover the contraption up.

Also attempted was a combo of rocks glued on top of a washer.

This hid the washer and supplied a base for the rocks to
be attached to. Be sure to leave the center open so that the
wire/line can come up out of the center.
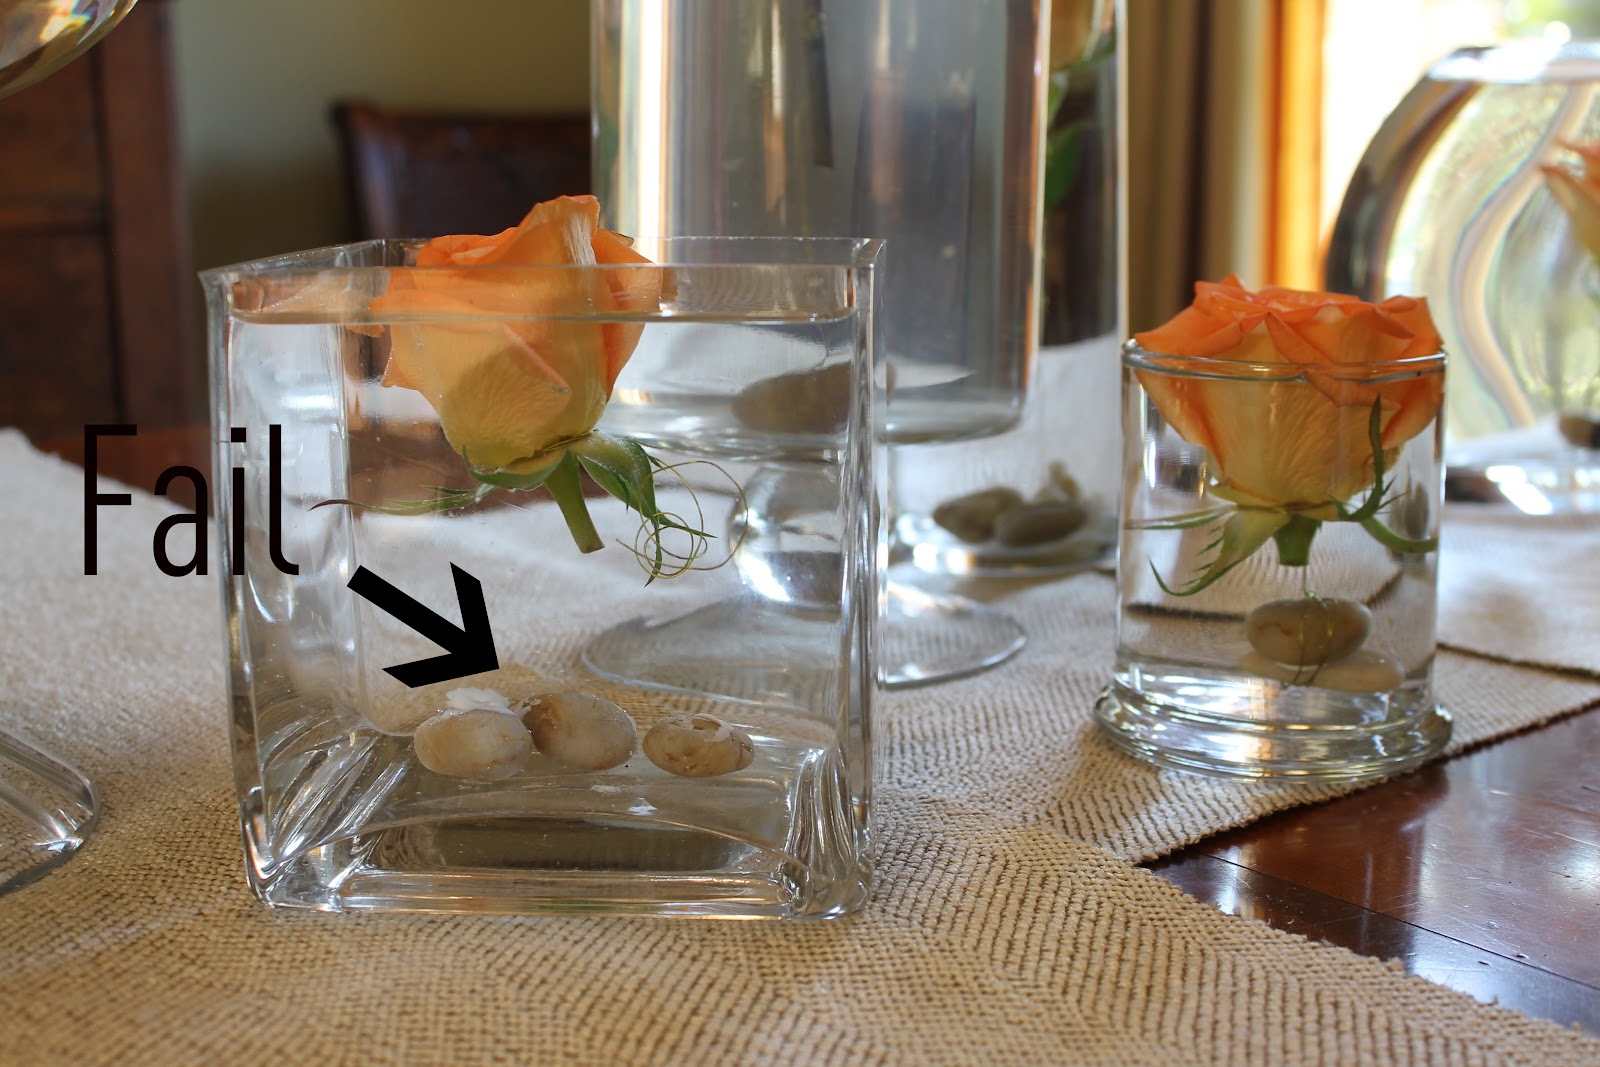
A big fat "fail" as a weight was to put clear weights (like
sea glass or glass pebbles) into saran wrap or a cut down
sandwich bag...even uglier underwater than before submersion.

So here is how some of the sinkers worked:


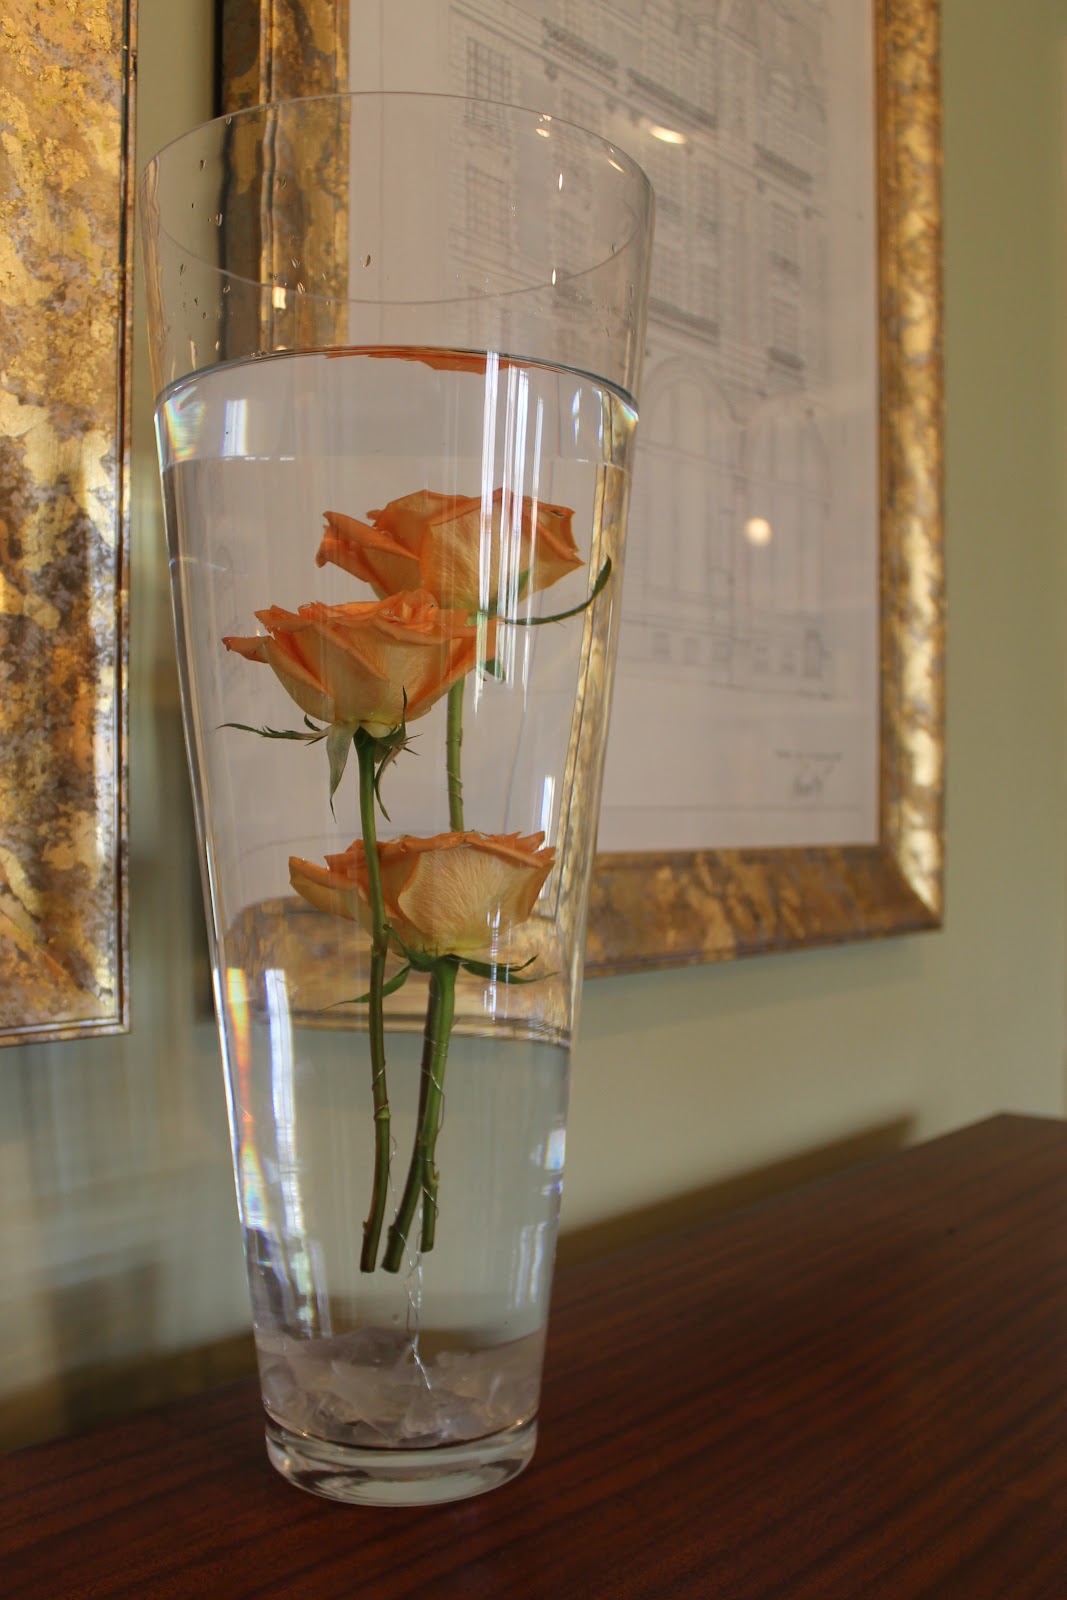
This reminds me of the rose in "The Beauty and The Beast".

The glass vases not only magnify the flowers but create interesting
effects like the flowers being reflected on the surface of the water.
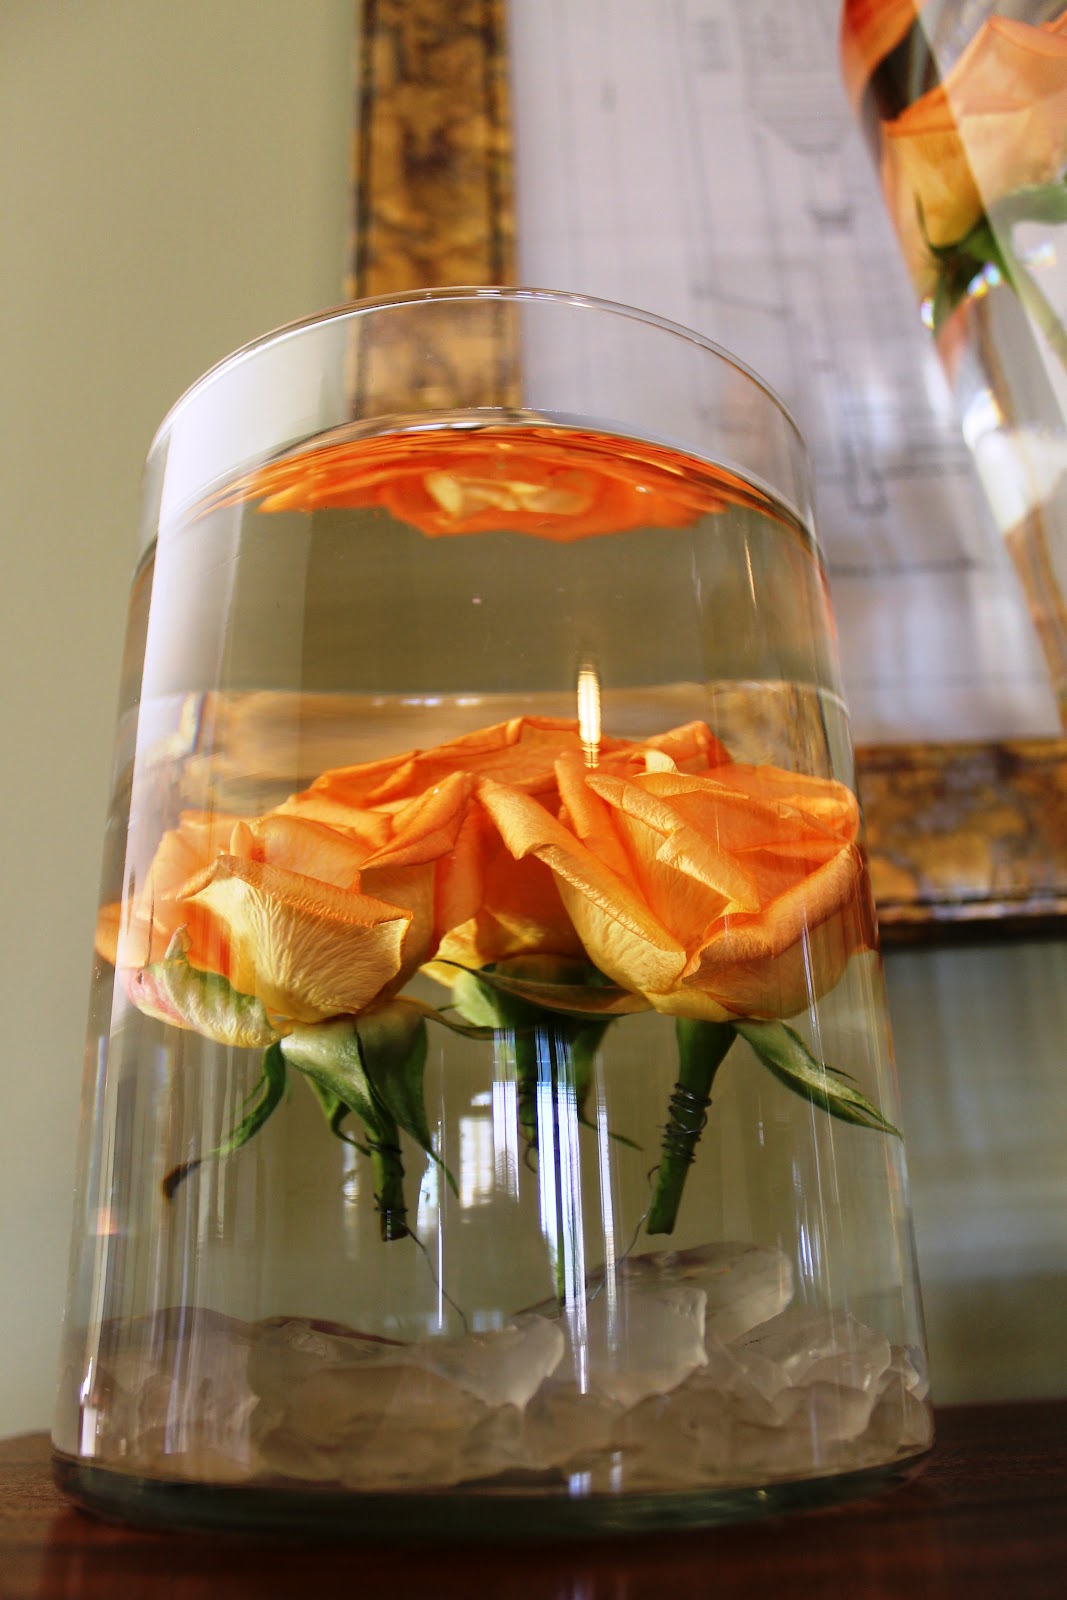
This vase used the washers as sinkers and then hiding them with sea glass.
I tried silver floral wire and gold floral wire to wind up the stems of the
flowers I think I liked the gold wire better.
Other colors of wire (found in the jewelry section of craft stores) could be used also.

I finally got the clear elastic to work but it was a lot harder to tie the knots, have the flowers
the correct height, etc. than the wire was. I originally was going to try fishing line for this
same effect but it was too thick. This is the rocks-glued-to-washer sinker.

Sometimes air bubbles would be caught on the rose petals...they looked almost like
little diamonds underwater. This rose is held by the original one-rock-one-wire sinker...
it took three to hold it down.It's not a bad look; it just has more wire around the stem of the flower.
This container is not big enough to fully submerge a flower but it could also serve
a purpose in a situation where you need a smaller arrangement.

The smaller vases could be clustered together for a bigger effect.

With the flower being weighted, it will stay where you want it in the vase
and not float willy nilly around like a similarly close cut rose in water might do.
Here is an example of where the glue did not hold the rocks together (my fault) and the flower is
free floating now. Its neighbor is still weighted down and has a more intentional look.
I moved the vases over to the dining room table
to see what they would look like maybe at a dinner.


To light or not to light...that is the question.
A contemporary look I have seen with the submerged
flowers is to also add submersible lights. I got a pack
to try them out...what do you think?


I had run out of sea glass to try to nestle the lights down so maybe they would not be so bright
(or maybe they are supposed to be like that?)
I took the submersible lights out and then just tried
good old candle light...it was a softer look.


Some random thoughts/tips:
I liked leaving some greenery on more than I thought I would.

Maybe too much greenery?

Maybe just right?
No greenery looks more contempoary (but maybe stark?)
If you use the J.B. Weld glue and want to cover the gray color
you can use finger nail polish to paint it.

This actually is a bad picture...the polish is not so shiny in real life.
I got this tip from a fishing TV show...fisherman use fingernail polish to paint sinkers on
fishing line. You could choose better colors; I wanted to buy the cheapest brand I could
find to test this out and these were the best colors I could come up with...
even the cheap brand stayed on underwater.
Other types of flowers can be submerged.
Orchids are one of the most popular
but I wasn't going to buy orchids for this experiment.

On the opposite end of the cost spectrum from orchids are mum-type flowers
so if you are on a budget, these might be a consideration.
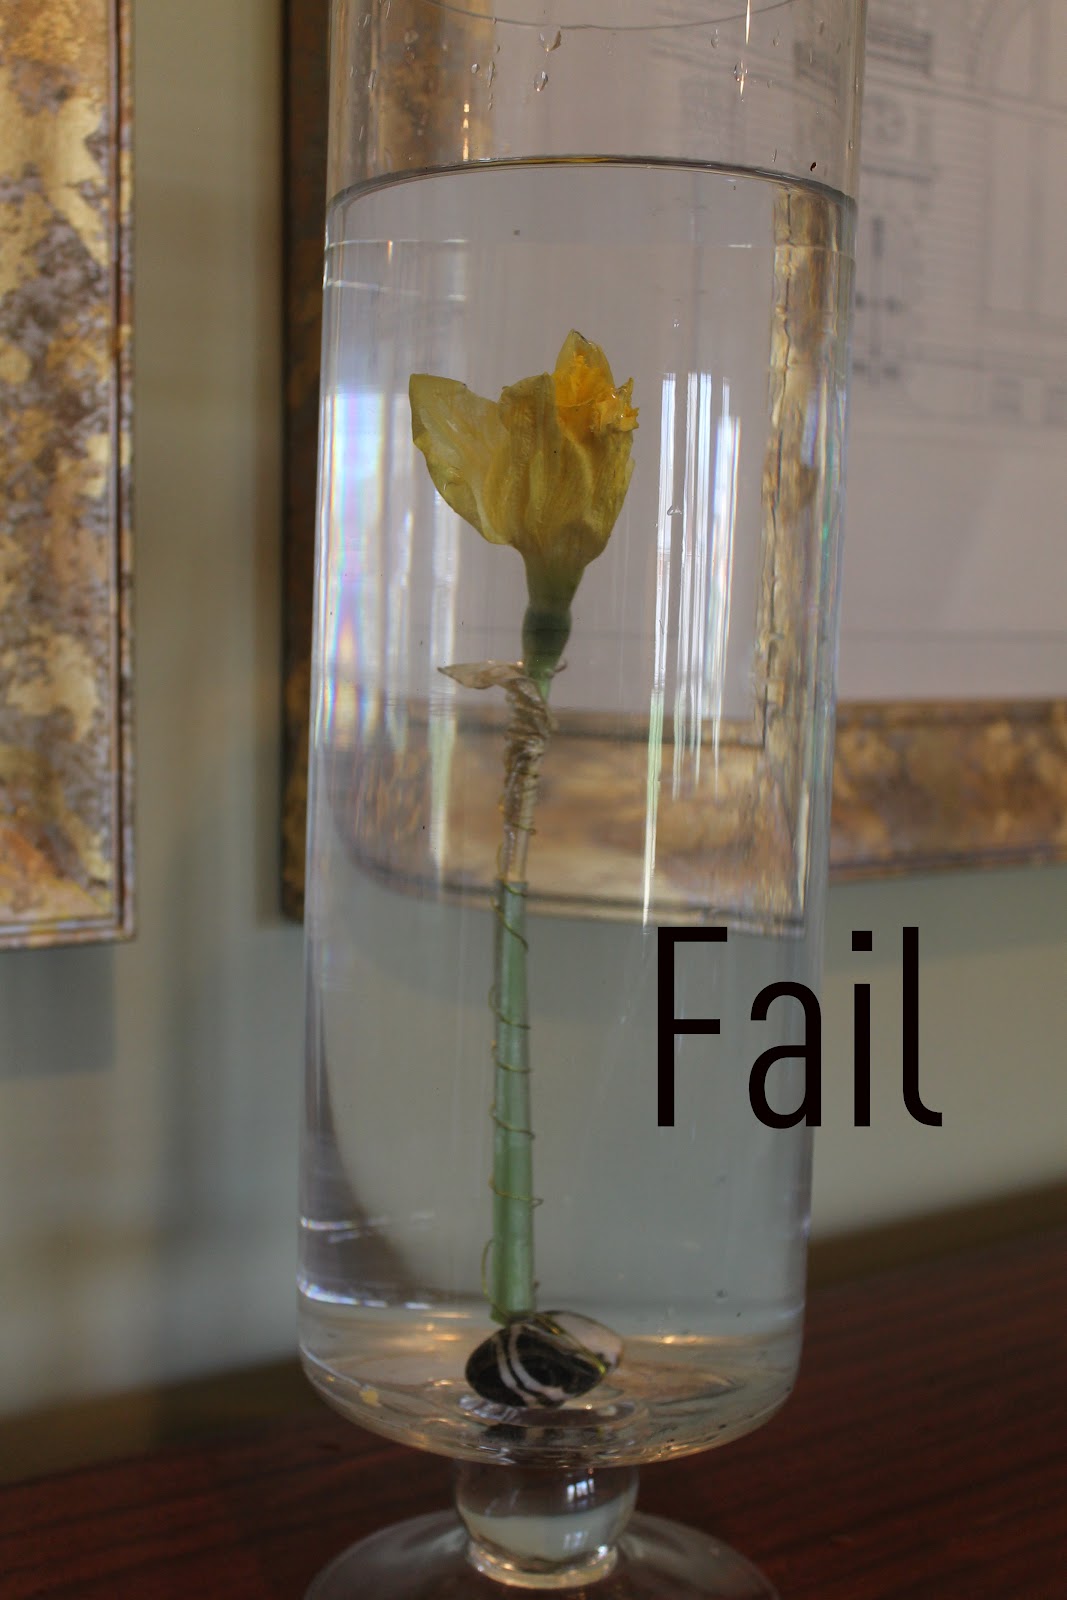
The flower does have to be strong enough to stand up to the water pressure.
This daffodil's petals just collapsed when it was tested.
If you already have the glass containers (or can borrow them)
submerging flowers is a very cost-effective way
to get a lot of bang for your buck.

The water bends the light and causes very cool effects through the glass.
Addendum...a couple of years after I did this blog post I
tried again to submerge flowers using other items to
achieve the look. Here is a link to the second blog post