
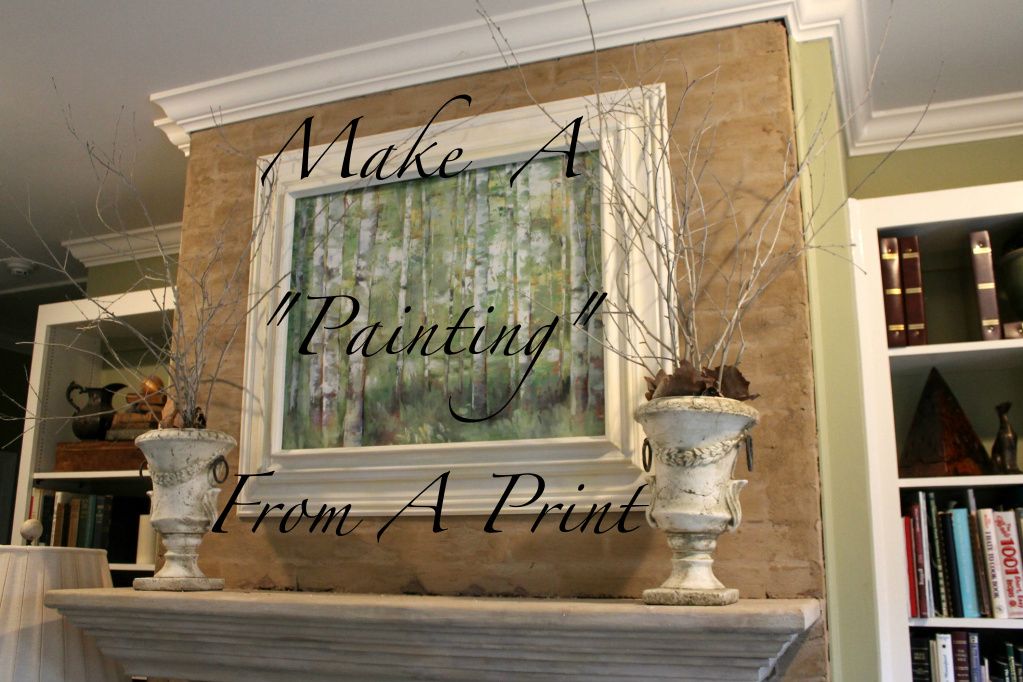
Want a change of scenery over your mantle or other area of your home but don't have the budget to invest in a new painting?
Here's how you can make a faux painting by using an art poster/print.
Select a print that fits your size requirements.
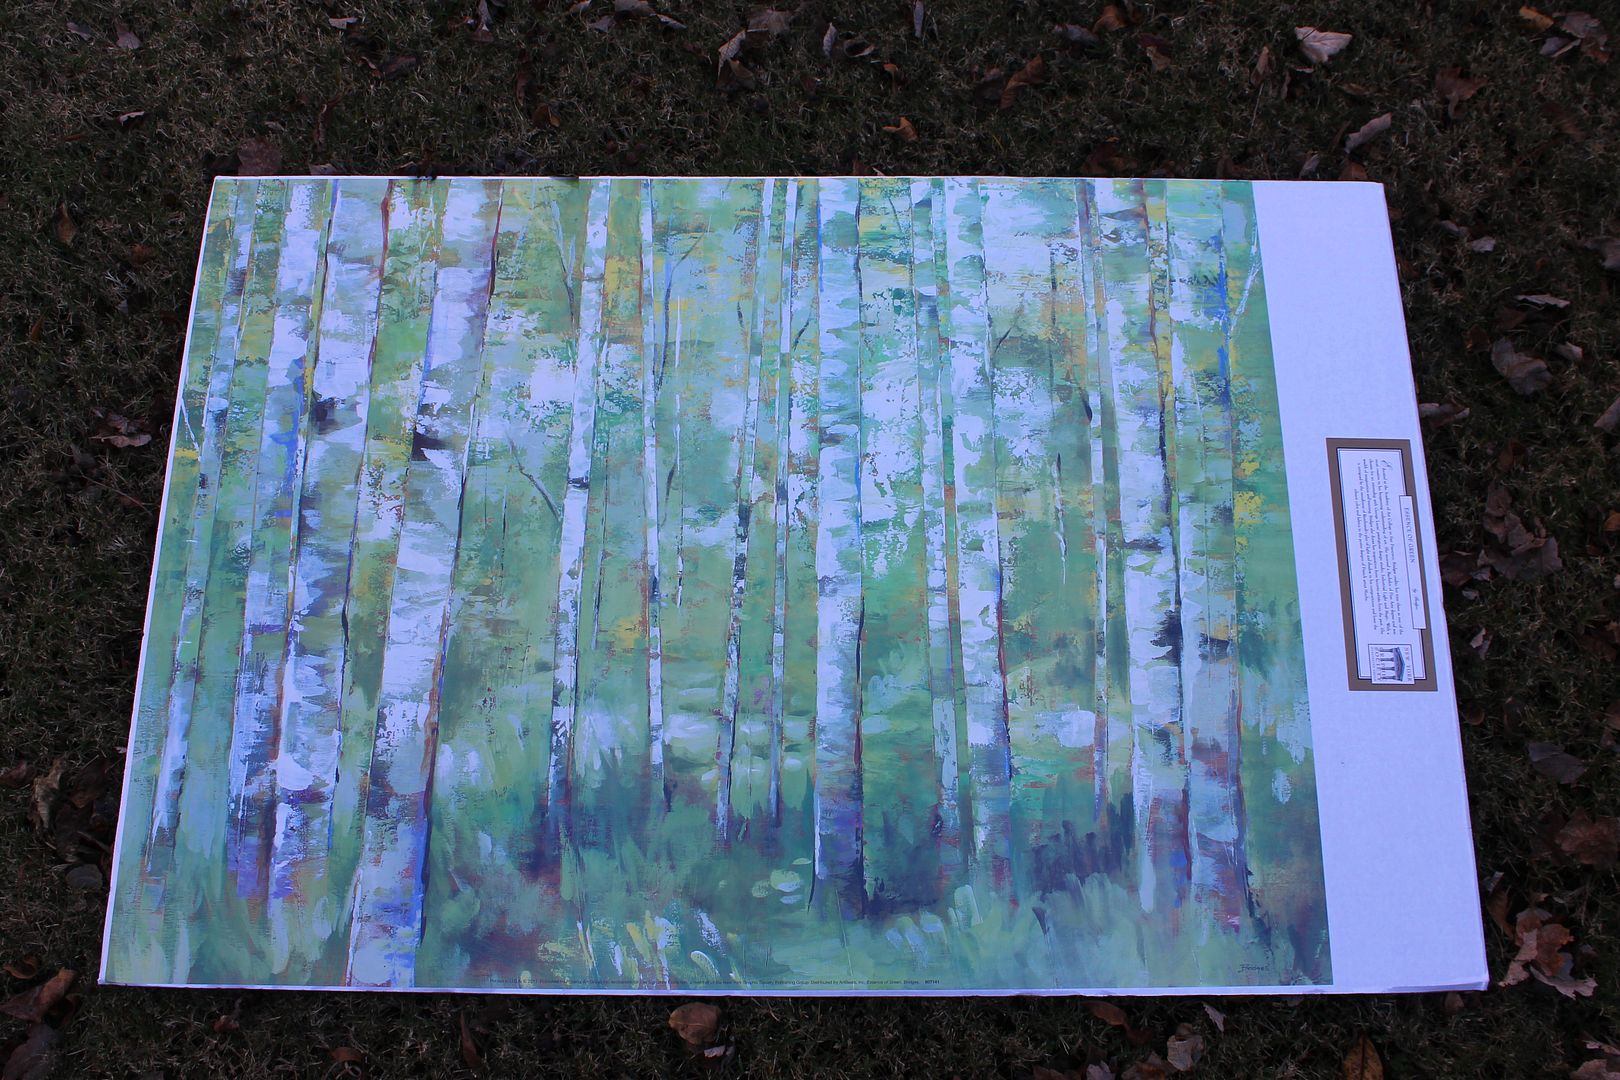
This poster/print came from Hobby Lobby. It is about the size I needed to go in an existing
frame that I had. I had to cut it down some to fit in the frame. Any text will also need to be cut
off to make it look like a painting so keep that in mind when selecting a size of print.
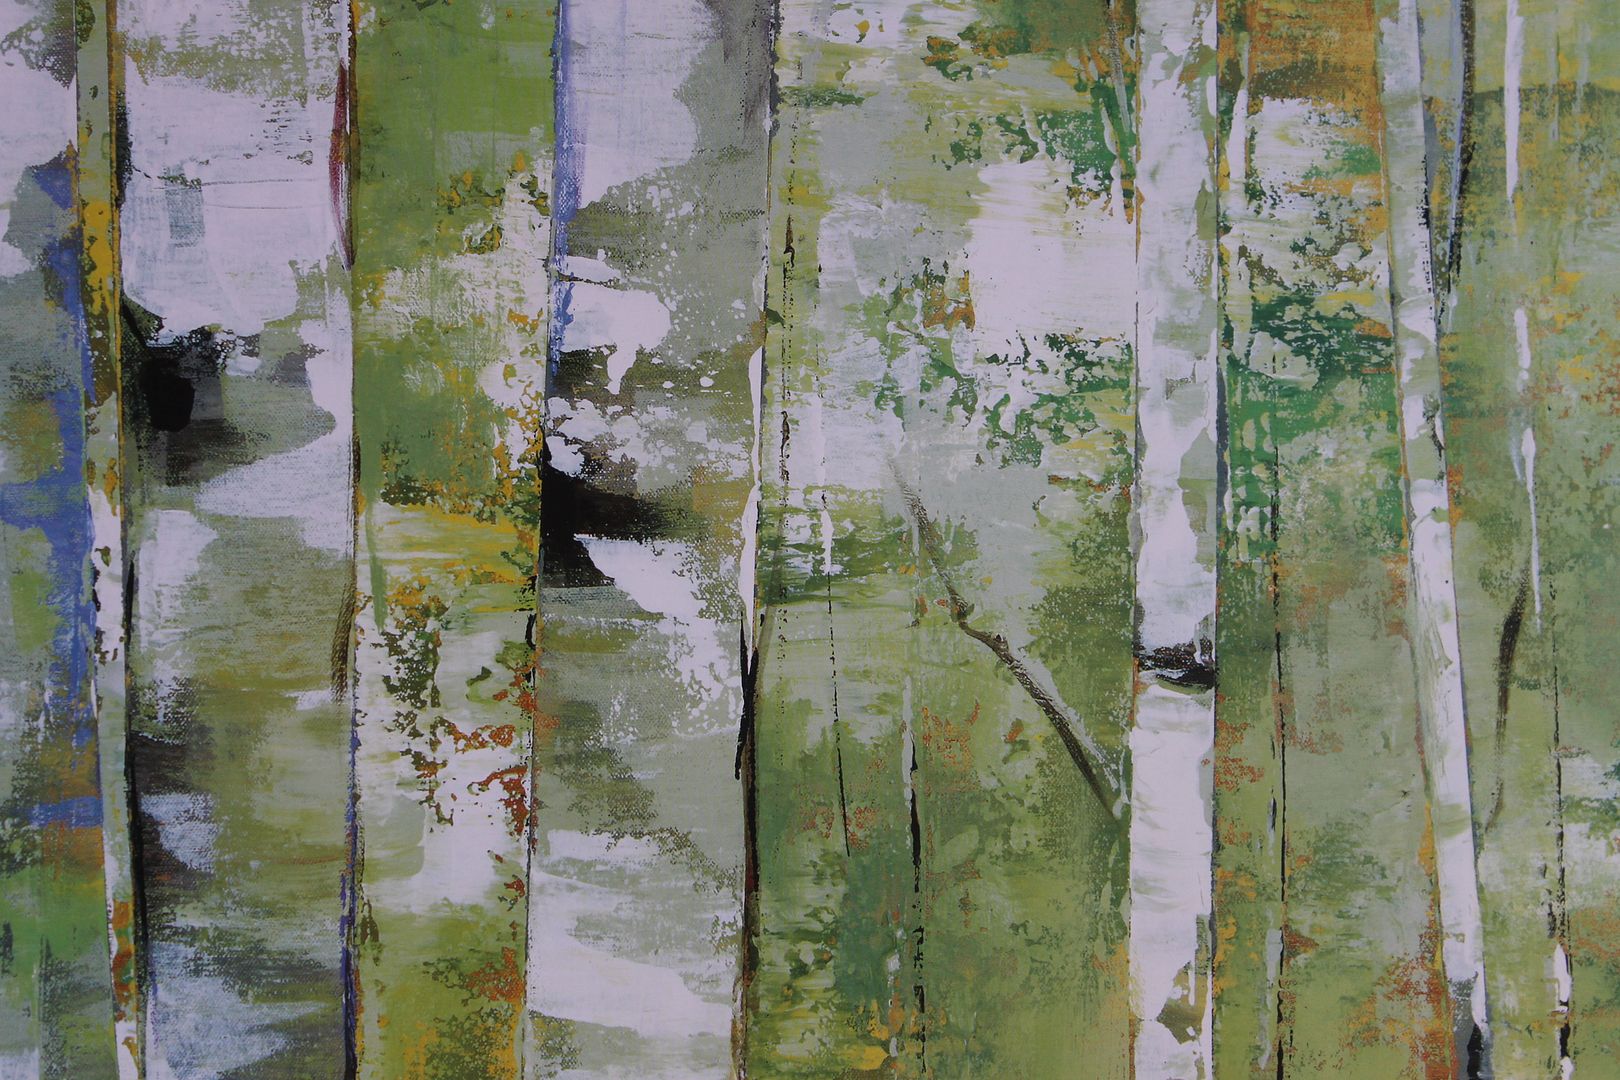
It also helps to "fool the eye" if the print has
a painterly look to it with visible brush strokes.
Cut a piece of foam core board to fit snugly inside the frame.
Cut the print to be the same size as the foam core.
Attach the print to the foam core with spray adhesive.
When that is dry, spray the print with a clear acrylic sealer.

Using spray adhesive keeps the print from getting wrinkles and bumps that regular
glue would produce. Spray adhesive can be a mess...I always do it outside.
Wait for a low humidity day to do this step.
The sealer also helps to keep the print from wrinkling when the gel medium is applied.
When the sealer is dry, apply the gel matt medium
(found in the artist section of craft stores or in art stores).
Put the medium on in the same direction that the brush strokes on your print are going. If your print does not have a brush-stroke look, apply the medium as if you were painting the objects on the print, following the shape of the object with the brush to create stroke looks.
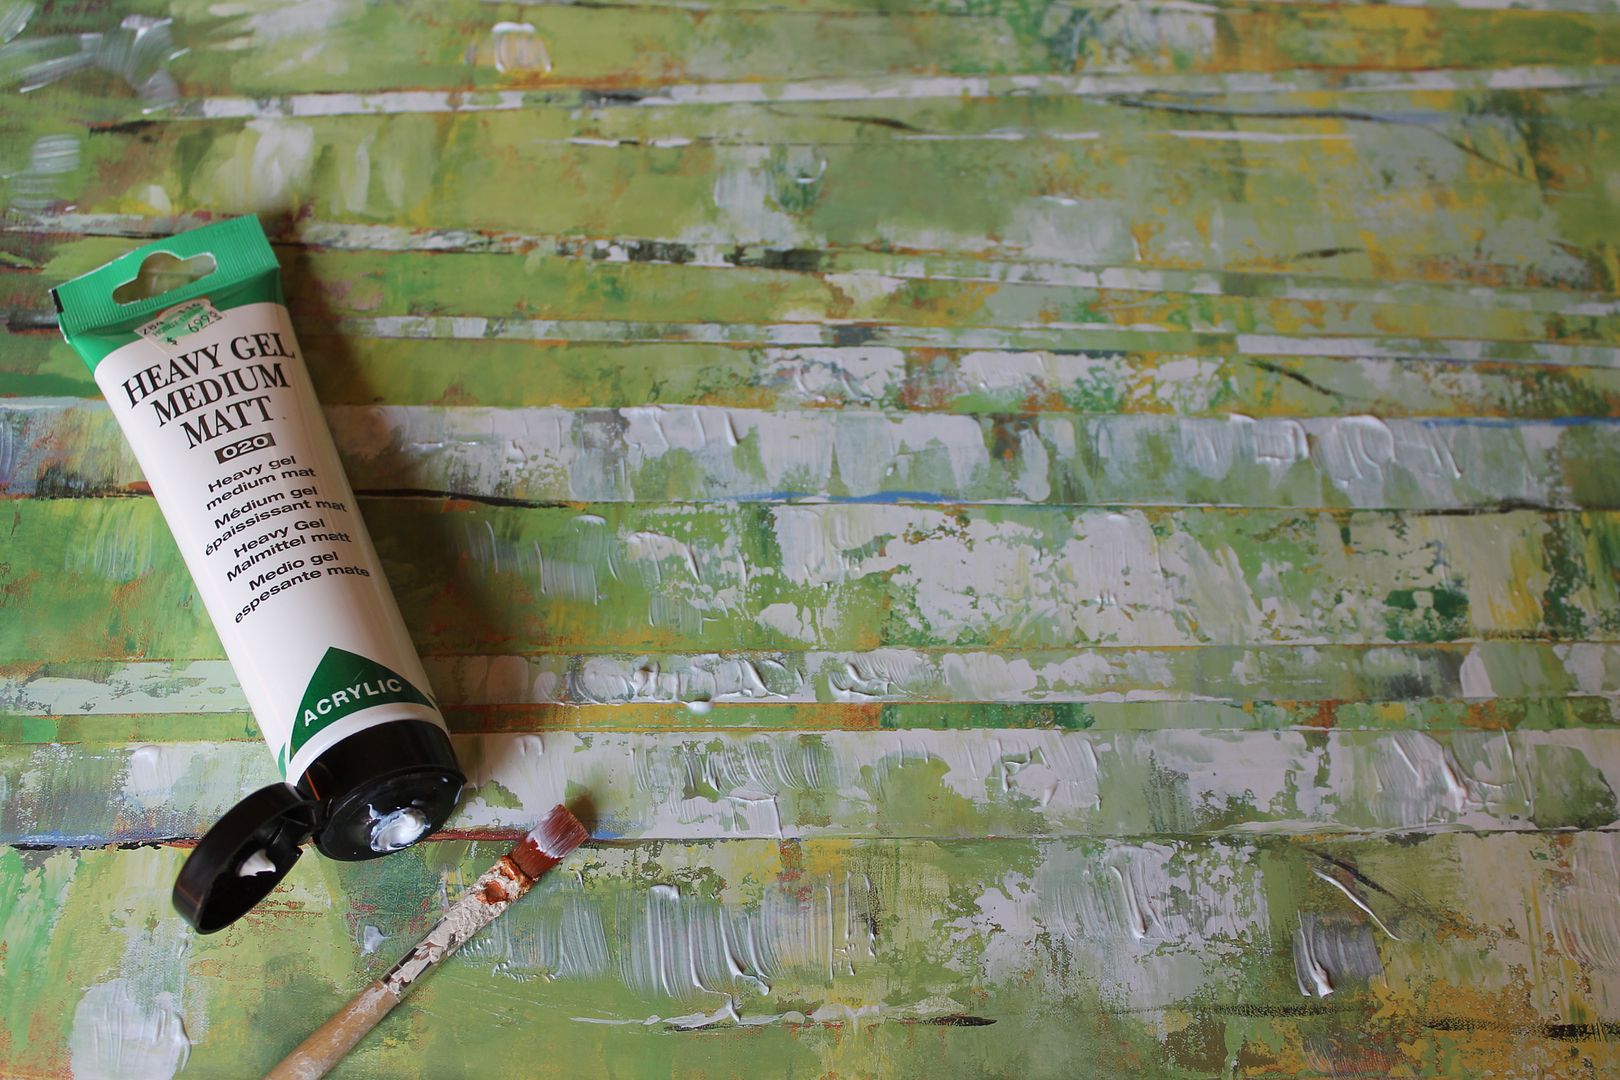
You can apply the matt medium with a brush or a pallette knife.
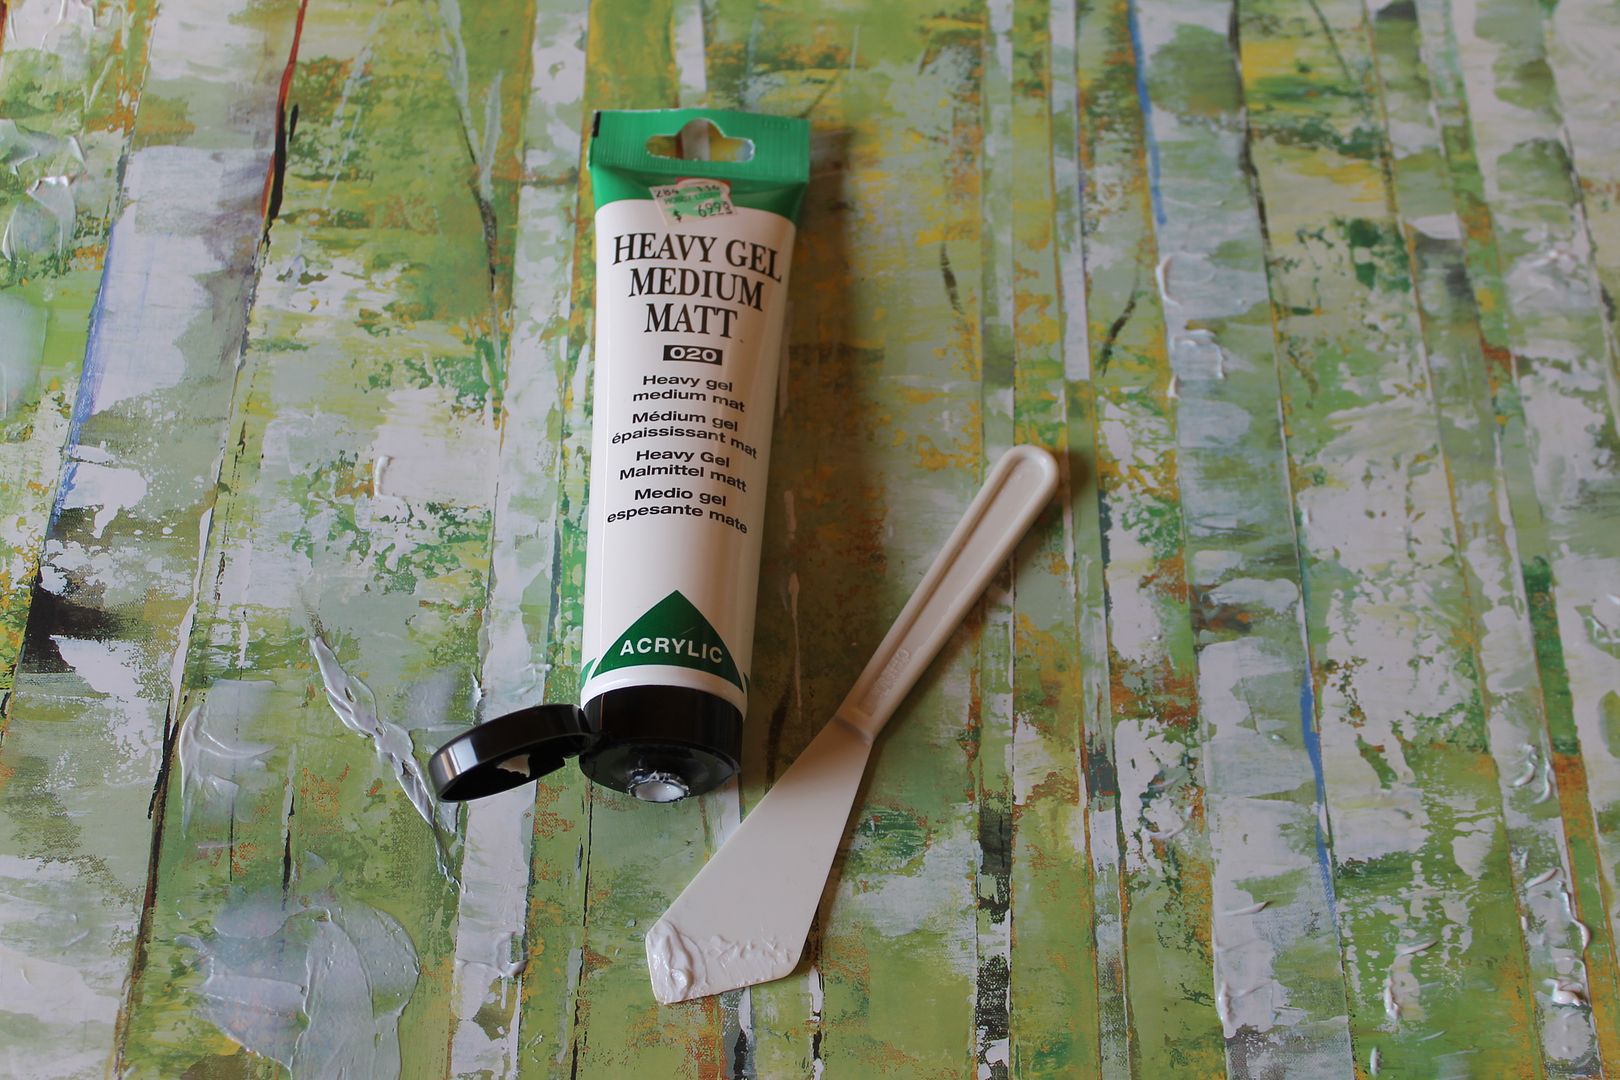
A pallette knife is also in the artist section of craft stores. This one is just plastic. It came in
a pack of about 4 different sizes for $3. I felt very "artsy" using it. It gives a different look than
brush strokes. I think the artist of the print used a pallette knife to paint some portions of the original.
You can build up layers of the medium, letting it dry between coats.

It's a personal preference how much/how thick you want the medium to be.
Even though I was using the heavy gel medium, it took several coats to get as much
dimension as I wanted on the print. I have seen some prints in stores with the medium applied
too thick (for my taste) and in a haphazard brush stroke manner that did not look real at all.


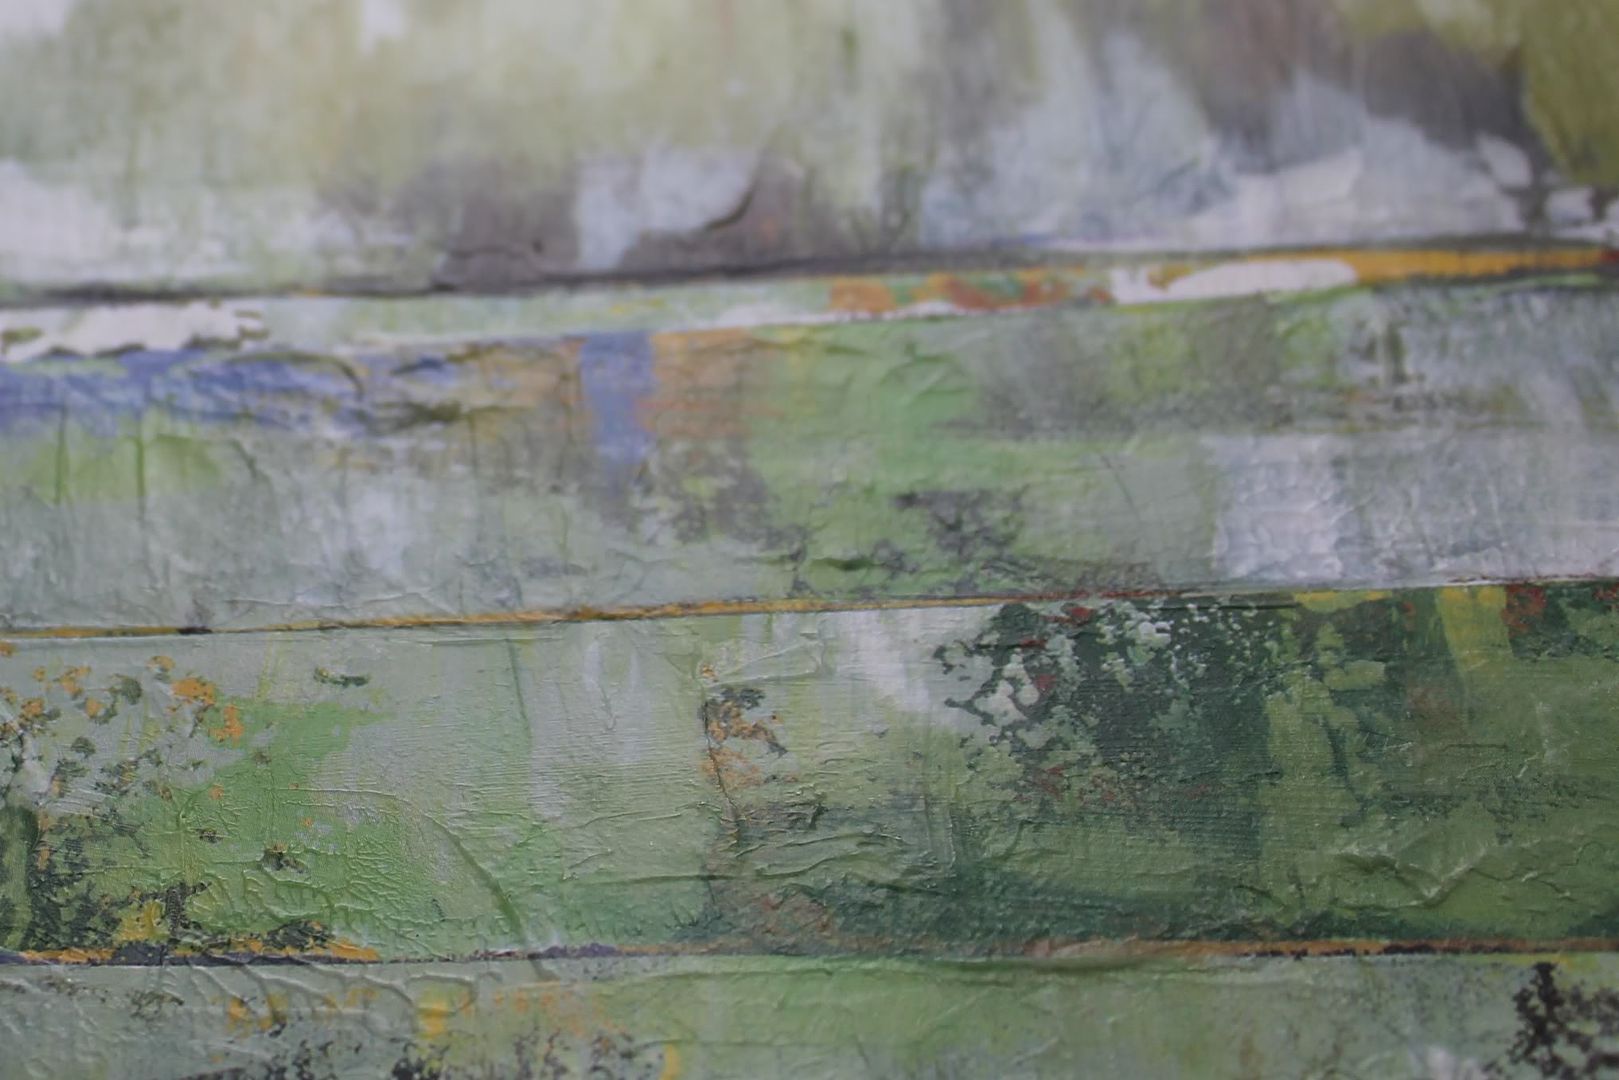
You could apply the medium heavier than this if you like. The piece does not scream "look at
my brush strokes!" when you come in the room but up close it does look and even feel like
a real painting.
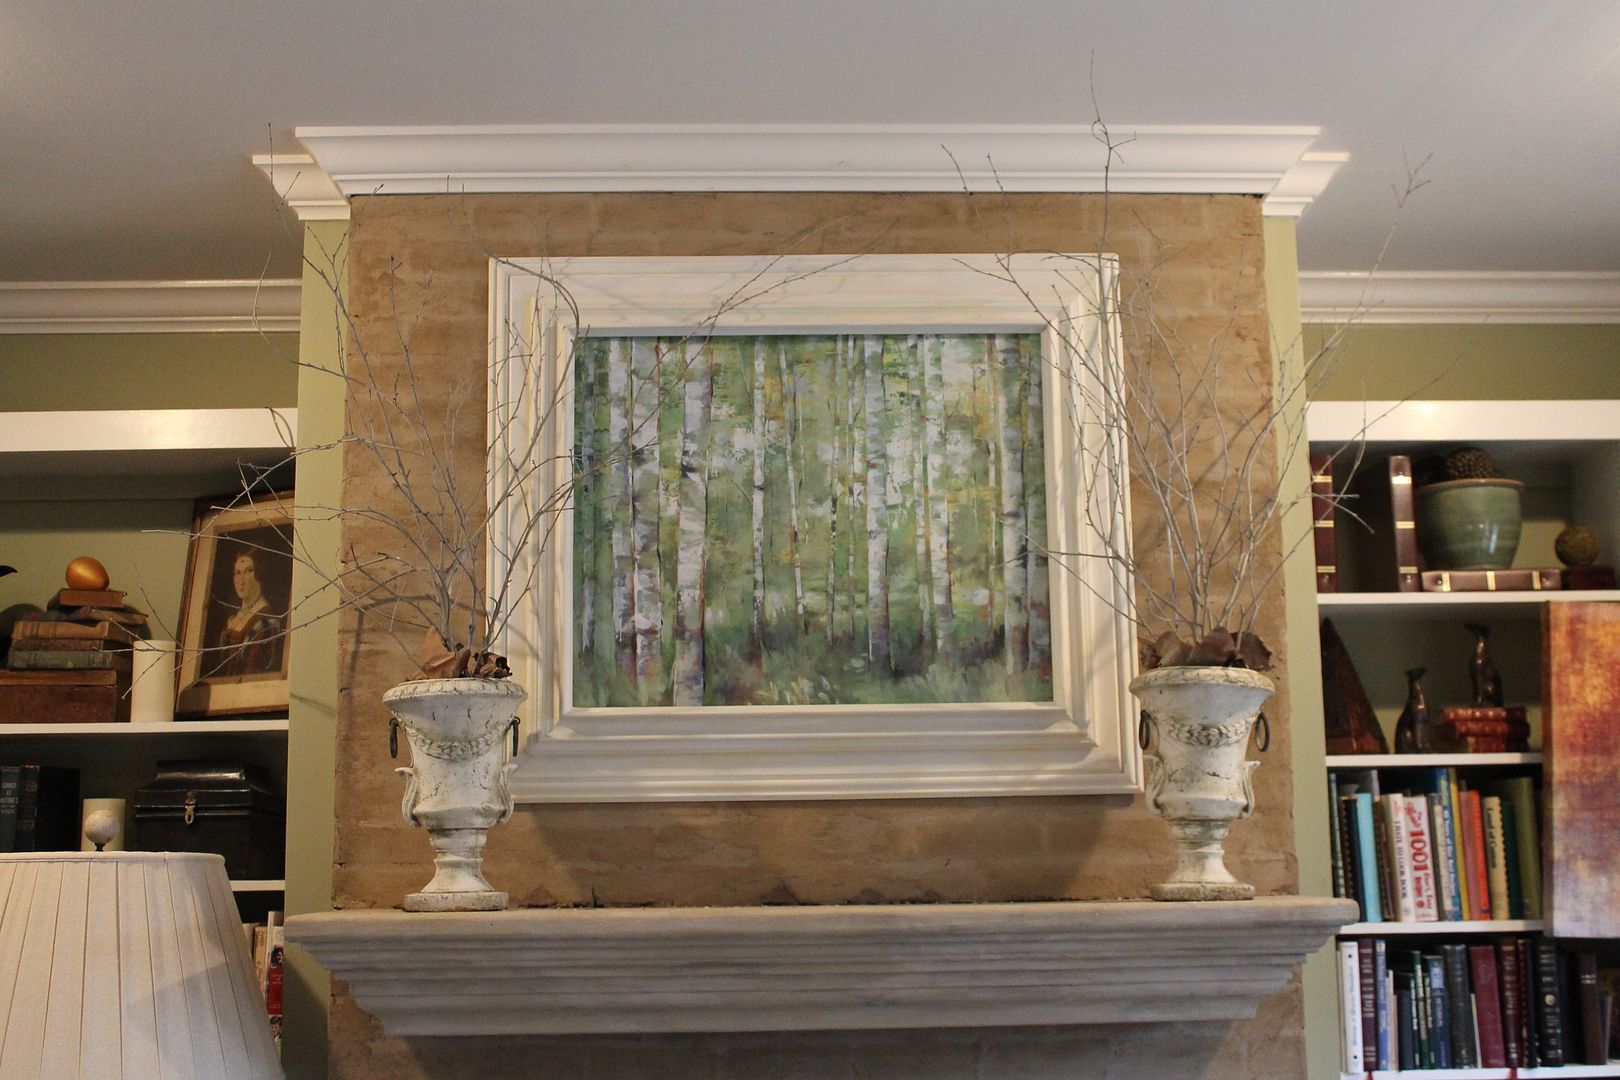
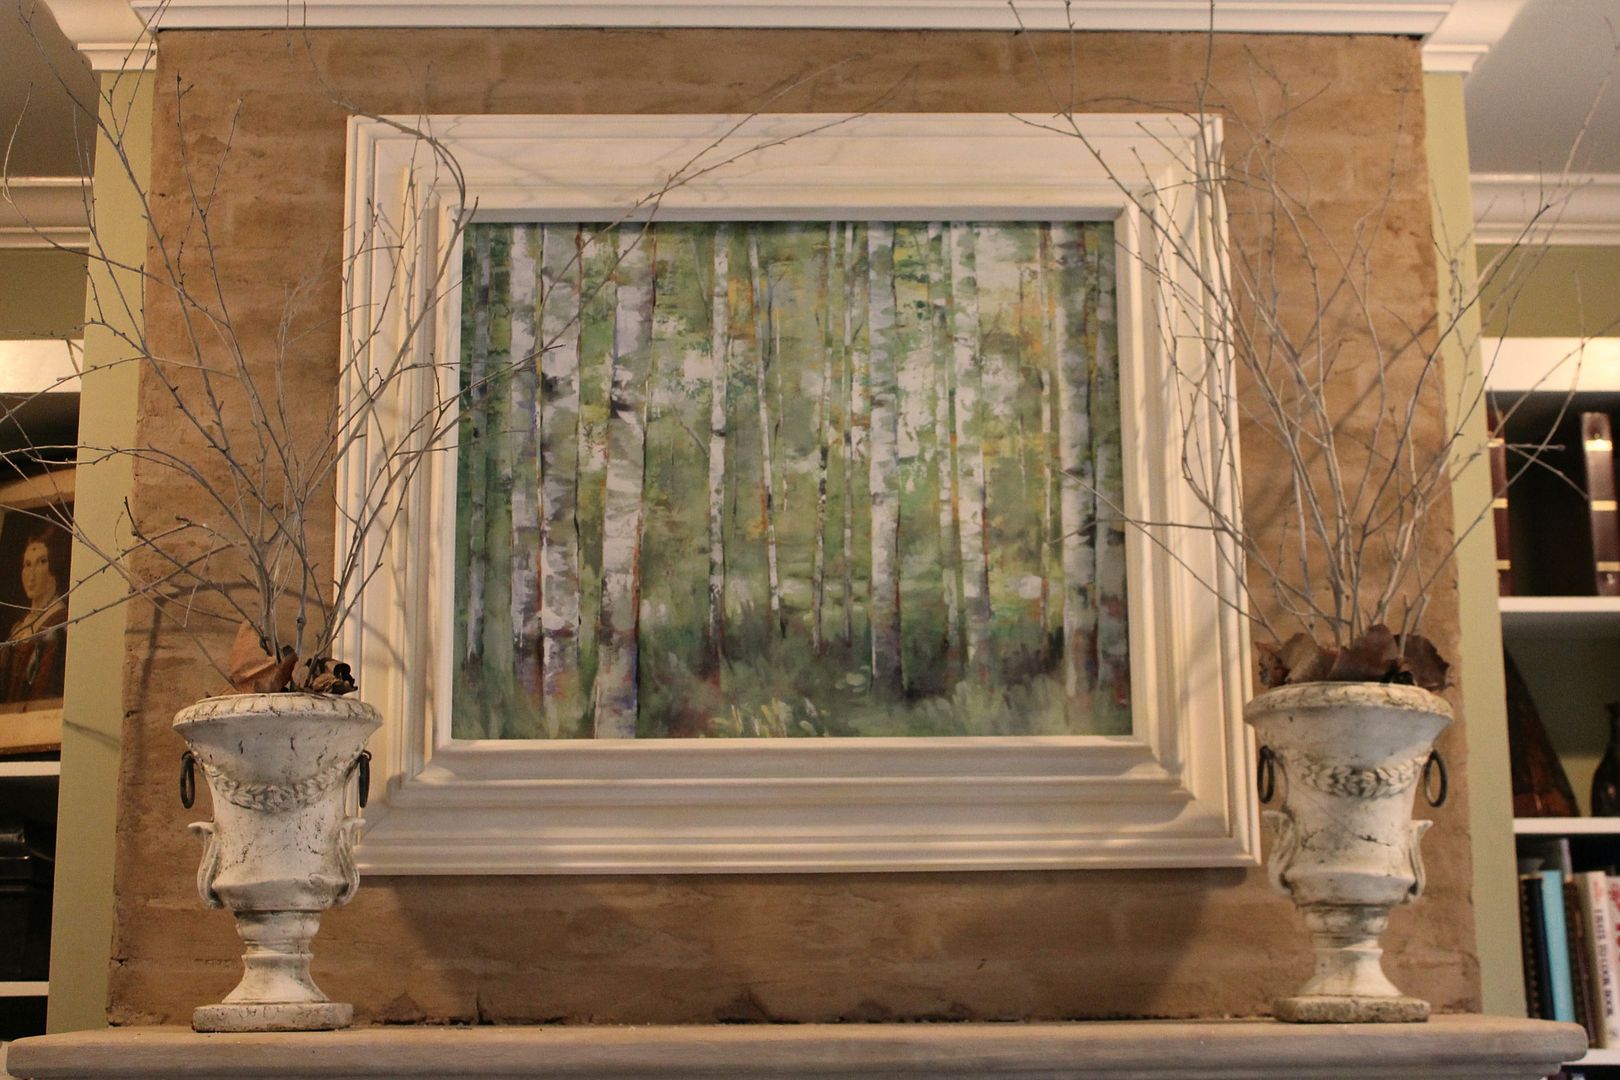
The "painting's" birch trunks go with the Winter White Decorating look that I have in my living room now. The green
of the background goes well with my wall color.
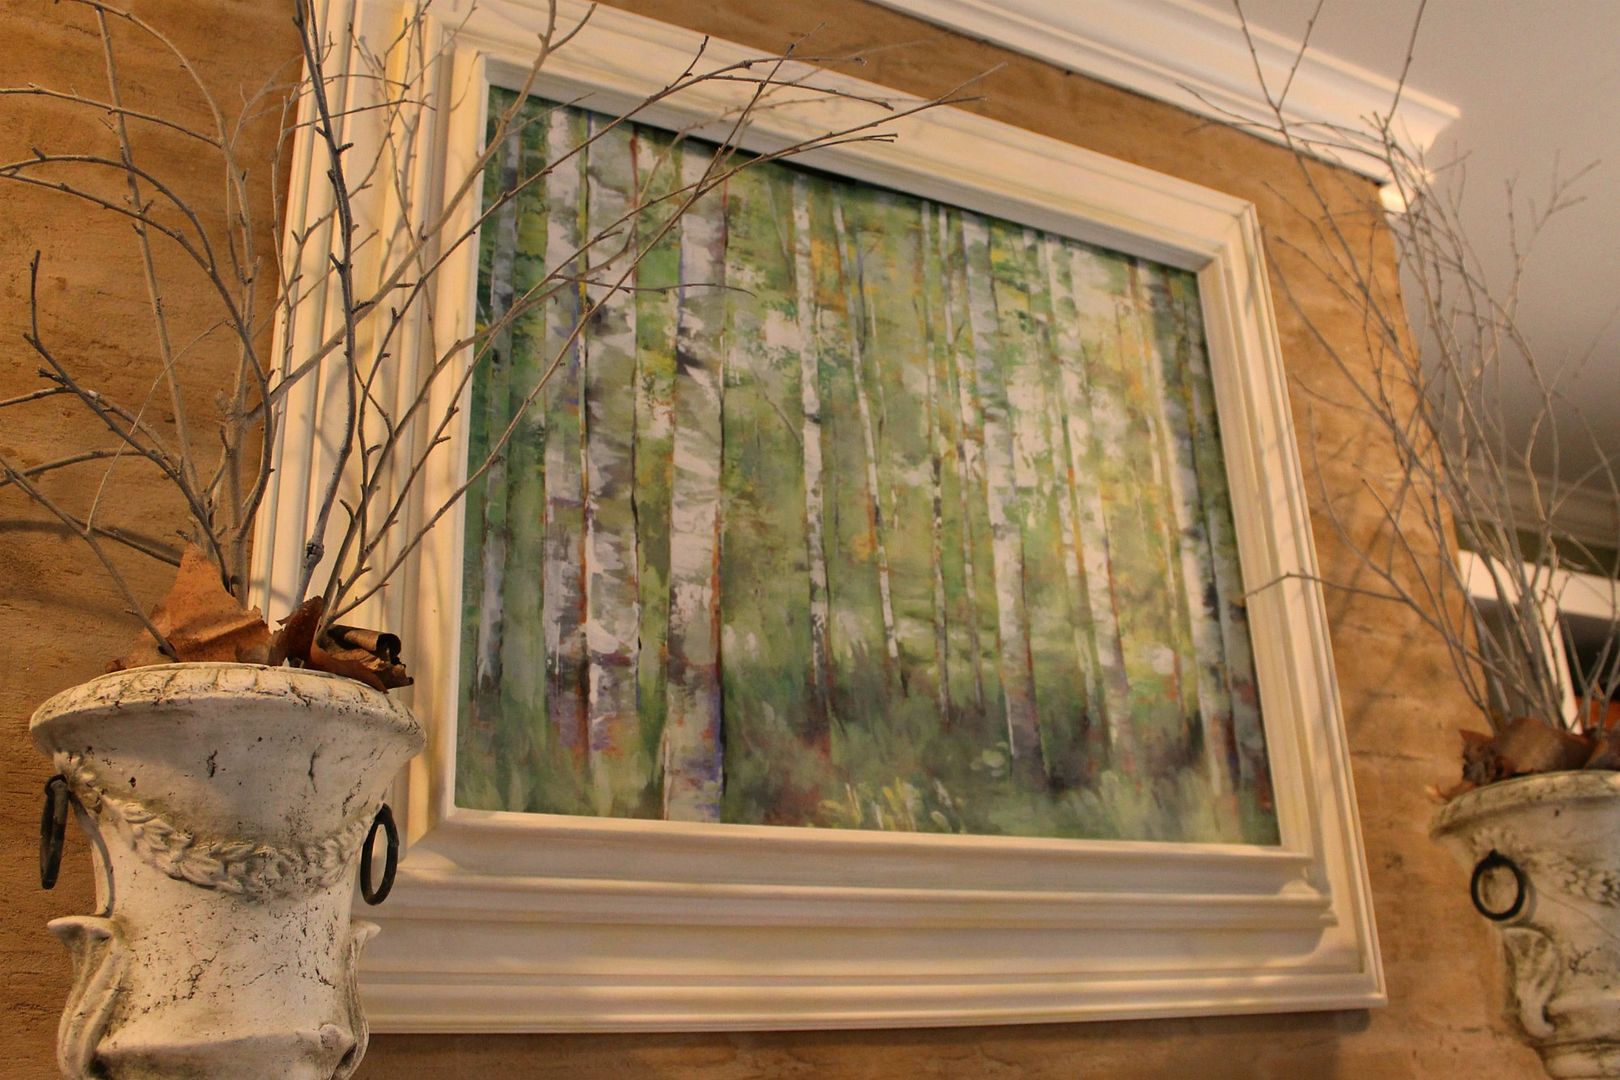
The birch trees in my area are mostly "River Birch" and
not as large as the ones in the "painting" but I
gathered some fallen branches and bark from our nearby
birches to add to the white urns on the mantle.
After the visual overload of Christmas,
I like to see the spare-ness of branches during
the rest of Winter. Here are a few photos I have
taken recently of the beauty of branches.

Sunsets...

...and moonrise.

The frame that they birches are in was once brown and smaller in width. It was on a (real) painting but it looked drab.
To brighten and widen it, I painted it a couple of shades of white and added some moulding to it.
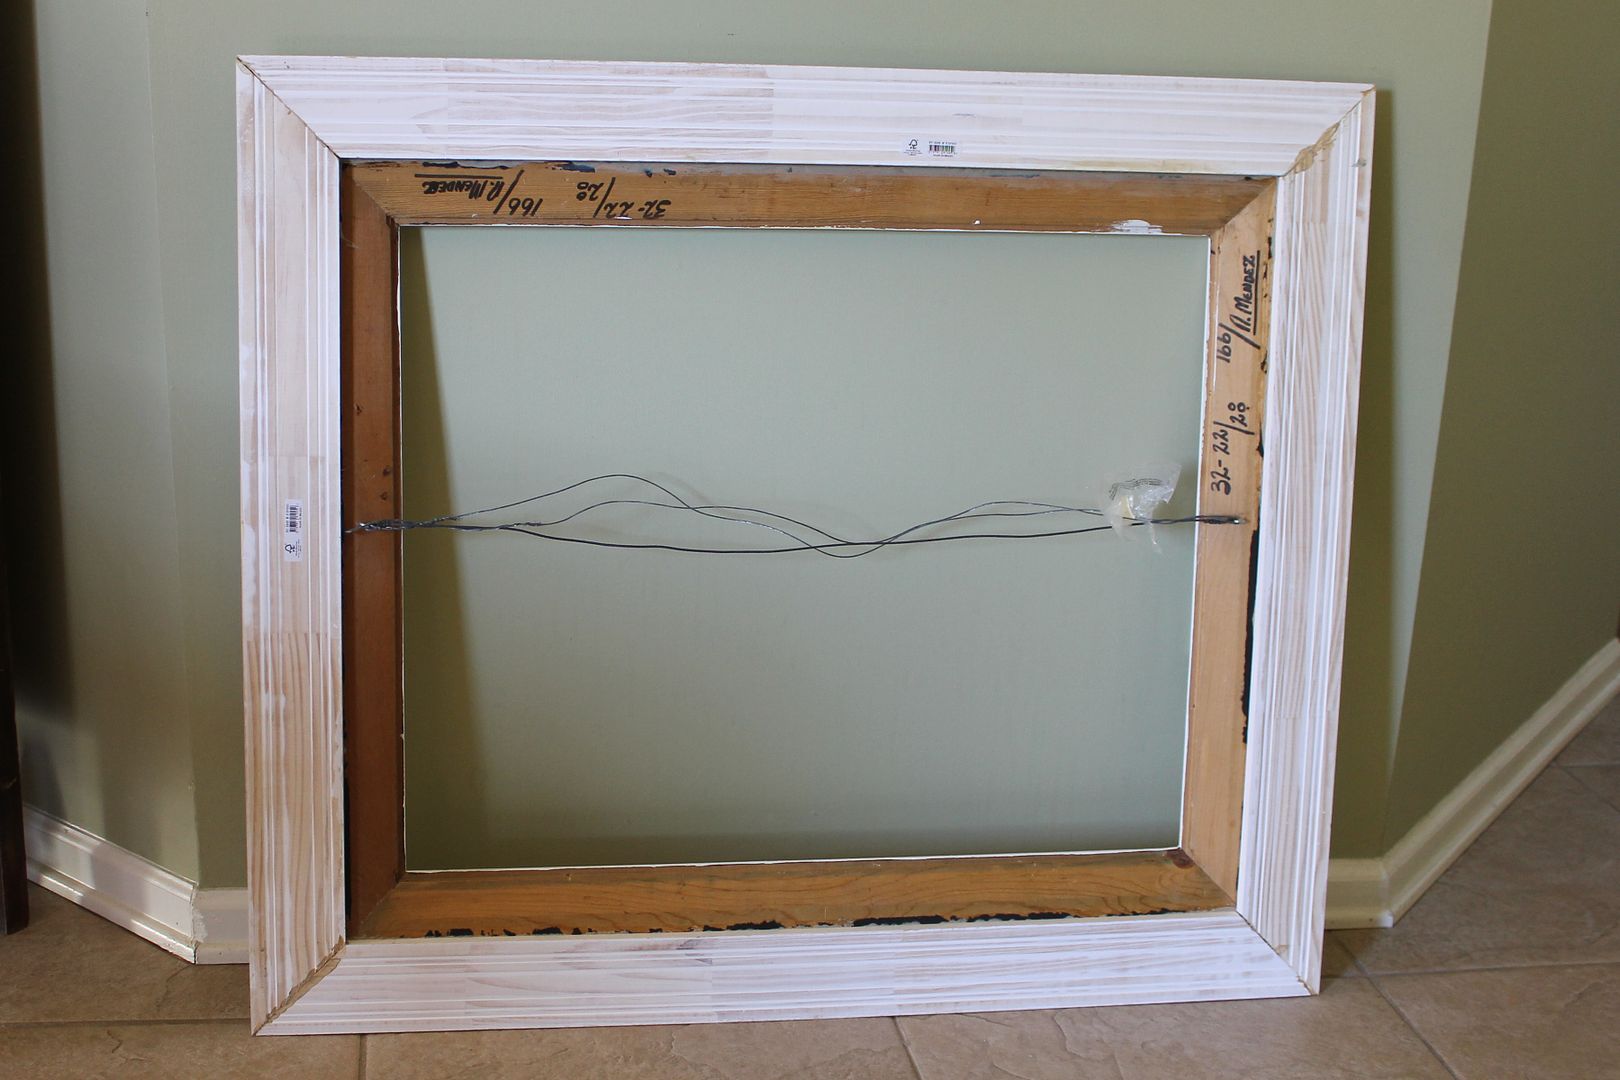
The brown portion is the original frame. I cut the white moulding with a hand saw and
used construction glue to join the miter cuts together to make a larger frame.
Then the larger frame was glued onto the back of the brown frame.
The arrows point to the joint between
the old and new parts of the frame.
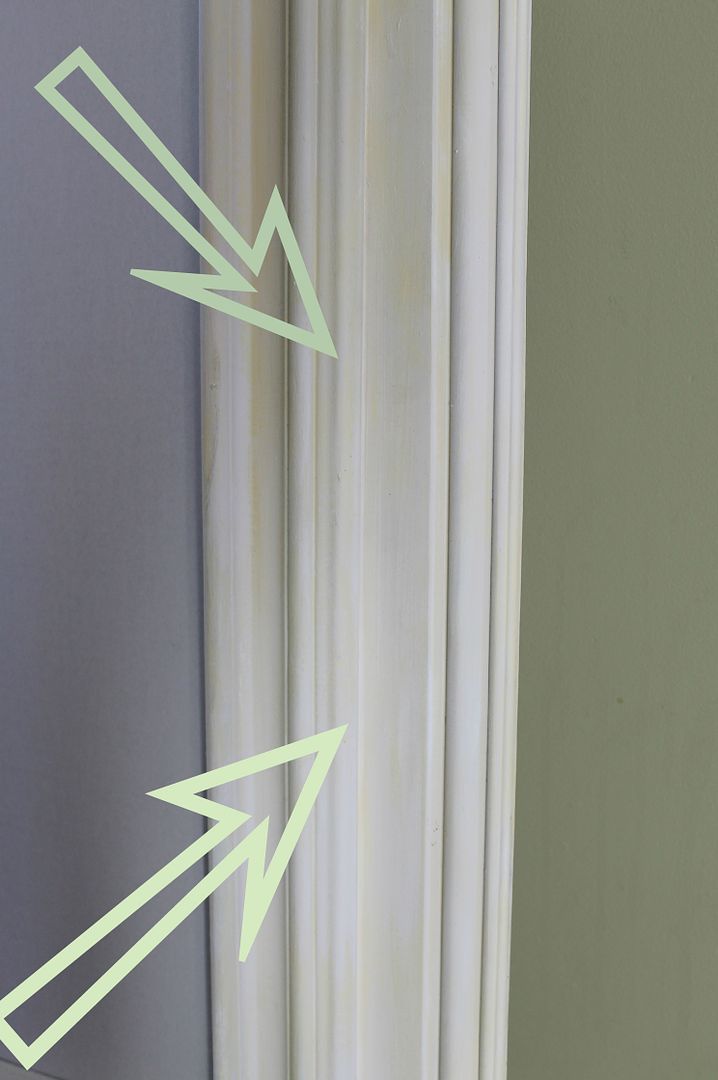
Wood putty and paint can cover a multitude of sins.


Good job, I like the print you chose. I agree after Christmas I almost want a bare look too.
ReplyDeleteThat is beautiful! I love the colors and the texture.
ReplyDeleteThat looks really great! Thanks for sharing the how-to~ xo Diana
ReplyDeleteAbsolutely beautiful!! LOVE the look you created on your mantel!
ReplyDeleteVery cool idea~ I love it! Have a great weekend.
ReplyDeleteXO Cindy
This was so interesting ... I've transferred prints on to canvas before, but this seems so much easier. Great job, and great tutorial!
ReplyDeleteYou chose a wonderful print for this project! It is very "painterly" indeed! Thanks you for sharing your project and your beautiful photography at Potpourri Friday!
ReplyDeleteI was skeptical at first until I read your whole post. Now I think this is fantastic and it looks great! Thanks for sharing.
ReplyDeleteVery clever,
ReplyDeleteIt looks really good.
I will have to look at some more of your creations.
Kelly
Your "painting" looks so real. I love this idea!
ReplyDeleteIt turned out BEAUTIFUL!!! XO, Aimee
ReplyDeletewow! love it!
ReplyDeletethanks for linking up to Make it monday! Just shared it on the Brassy Apple FB page!
Love this idea and certainly going to use it. The birch tree painting/print came out gorgeous.
ReplyDeleteWhat an incredibly unique idea!! I have never seen that done. I love the results. The birch trees are beautiful!!
ReplyDeleteSuch a smart idea! I can't wait to give this a try. What an inexpensive way to create art.
ReplyDeleteWow! That was fantastic! What a nifty idea, I'm so glad I dropped by! I also share your love of bare winter branches against the sky - lovely!
ReplyDeleteYou are a genius! I am so doing this, I loved the idea for making the frame nicer too.
ReplyDeleteI love the way you "fixed" this print. It looks gorgeous above your fireplace. Thanks for your sweet comment on my blog. Following you back!
ReplyDeletehi Miss Kitty ... love this picture. Thanks for the tutorial, I would love to try that.
ReplyDeleteThanks for visiting my blog and leaving a nice comment.
Blessings.
Audrey z. Timeless Treasures
audreyzumwalt.blogspot.com
That is the coolest thing ever! I love how it turned out. I've always wanted to try this, either from a picture or a print. Thanks for sharing!
ReplyDeleteIt looks great! Nice tutorial, Thanks!
ReplyDeleteWonderful idea! I just pinned this. Thanks for the inspiration.
ReplyDeleteblessings,
karianne
Cool project and informative post!
ReplyDeleteWhat a wonderful idea! The print you chose goes so nicely in your space.
ReplyDeleteWhat a wonderful idea!! This is one project I'm definitely going to try! I'm thrilled to have found your blog & just became your newest follower!
ReplyDeleteGenius!! Fab idea. Thanks for sharing.
ReplyDeleteThis is brilliant and exactly what I needed. I'm hoping to put up some faux Victorian oil paintings in Hubby's Steampunk Study and this may be a way of making them look less 'faux'. Thank you, thank you! (The idea for enlarging the picture frame is pretty amazing, too.)
ReplyDeleteOMG ... Brilliant. an oil painting for less!
ReplyDeleteI just saw a pic of yours on Facebook, so had to come over and take a look at your blog. Im enjoying it so that I've just become a follower. Please come visit me at PICKINandPAINTIN.blogspot and maybe you'll follow back. THANKS.
ReplyDeleteThis comment has been removed by a blog administrator.
ReplyDeleteHow have you dealt with any potential bubbling or peeling? I usually just get the picture printed straight to the foam core. There are a lot of service, I use this one. Basically, rather than having to mount it yourself you can just get the print directly and not have to worry about peeling or anything!
ReplyDeleteThis comment has been removed by a blog administrator.
ReplyDeleteI know I'm late to this party ... but what a genius idea! I was admiring your painting in another post and noticed the sidebar link. Love it!
ReplyDelete:) Linda
Well, now I feel dumb. I asked in an earlier comment today if you had painted the painting above your mantle. Now I've gone through some of your blog today off and on, and just seen this post. Now I have my answer. Very neat trick that you did painting on the poster to make it all "your own". I never would have thought of that.
ReplyDeleteI found this a couple of years after you posted it! The hard part was the gluing. I ended up using those butterfly clips you use in an office to attach the bottom part of the poster to the foam board after I got it line up prior to gluing, folded over the poster (pulled it back), applied the adhesive and then rolled the top 3/4 of the poster over it, rubbing out any bubbles. Then I unfastened the clips at the bottom, lifted the bottom portion of the poster, applied adhesive to the bottom 1/4 of the foam board and pressed the bottom of the poster on to it. I am a horrible painter, so after I applied the matte gel, I just wadded up a light weight plastic bag and dabbed it all over. It didn't give me the brush strokes, but it did provide a nice texture. I hopeless as a painter.
ReplyDeleteThis comment has been removed by a blog administrator.
ReplyDeleteQuick question for you, Do you know how to approach turning a print into a cracked/crazed effect old painting? I have a cool print of Marie Antoinette that I want to do this to. I'd like to make it look like something old hanging in an art gallery!
ReplyDeleteLove what you did to the tree print by the way!
Marie
Hello! I am in the middle of recreating this beautiful project, but there are a LOT of acrylic gel options...would you please share the brand of the one you used? it seems they are not all created equal :) thanks!!
ReplyDeleteWhat a fabulous idea to create beautiful large-scale art inexpensively! You are so smart to think of this technique.
ReplyDeleteThis comment has been removed by a blog administrator.
ReplyDeleteThis comment has been removed by a blog administrator.
ReplyDeleteThis comment has been removed by a blog administrator.
ReplyDeleteThis comment has been removed by a blog administrator.
ReplyDeleteThis comment has been removed by a blog administrator.
ReplyDeleteThis comment has been removed by a blog administrator.
ReplyDeleteThis comment has been removed by a blog administrator.
ReplyDeleteThis comment has been removed by a blog administrator.
ReplyDeleteThis comment has been removed by a blog administrator.
ReplyDeleteThis comment has been removed by a blog administrator.
ReplyDeleteThis comment has been removed by a blog administrator.
ReplyDeleteThis comment has been removed by a blog administrator.
ReplyDeleteThank you a bunch for sharing this with all of us you actually realize what you are talking about! Bookmarked. Please also seek advice from my site =). We could have a hyperlink change contract between us! movable partition walls
ReplyDeleteWow, that does not even look like the same vanity !! Very pretty !!! I had never heard of chalk paint before you posted on it, will have to check it out !!
ReplyDeleteresidential commercial painting services
The large majority of people looking to purchase triple bunk beds require beds for two children and the third bunk is used occasionally as sleeping options for the odd sleep-over. triple bunk bed
ReplyDeleteWow! Such an amazing and helpful post this is. I really really love it. It's so good and so awesome. I am just amazed. I hope that you continue to do your work like this in the future also coloured tarmac
ReplyDeleteThank you for such information.
ReplyDeleteVisit Elelaurels for purchasing Invisible Grill at the affordable price. The team of expert installers strives hard to produce superb services to their clients as per their request. After installation of the undetectable grille to your premises, you and your members of the family always feel safe and luxuriate in the natural view from your balcony.
The measure of water important to mix the shadings in watercolor painting is additionally a matter of training that the painter learns as expected. When an individual gets the grip of these essential things, he would be viewed as prepared to proceed with watercolor painting all alone and examination with the craftsmanship to shape his unique workmanship. benutzerdefinierte Diamantkunst
ReplyDeleteThank you for such information.Visit Elelaurels for purchasing Sliding Invisible Grille Singapore at the affordable price. The team of expert installers strives hard to produce superb services to their clients as per their request. After installation of the undetectable grille to your premises, you and your members of the family always feel safe and luxuriate in the natural view from your balcony.
ReplyDeleteIt is likewise significant that prior to painting your room, you utilize a groundwork. where is the best place to buy diamond painting kits
ReplyDeleteThe proper kind of groundwork ought to be utilized for the surface being painted - wood, metal, mortar or tiles. There are some 'generally useful preliminaries' accessible which are intended for at least two of these surfaces. painter Putney
ReplyDeleteI really appreciate the kind of topics you post here. Thanks for sharing us a great information that is actually helpful. Danger Days Jacket
ReplyDeleteI read this article. I think You put a lot of effort to create this article. I appreciate your work.
ReplyDeletekenosha kickers jacket
Anti-buildup paints are utilized for rooms with sticky conditions like kitchen and restrooms. This paint is typically planned to forestall buildup and frequently incorporates fungicide. Painting Tyler Tx
ReplyDeleteIn any case, presently, it is to their incredible accommodation the online universe of painting and workmanship has end up being worthwhile and valuable for the craftsmanship gatherers. They are presently ready to appreciate and buy lovely bits of craftsmanship from home just through the web. fulldrilldiamondpainting
ReplyDeleteThe print market is tremendous and for quite a long time, it has been far off for some craftsmen. Before, you would need to discover a print producer to deliver, circulate, and sell the prints for you. Or on the other hand you could buy prints straightforwardly from a printer and sell them yourself – yet circulating them for an enormous scope was extremely challenging. These courses are as yet taken by certain specialists today, yet assuming you need to boost your benefit, then, at that point the best arrangement is to print and sell them yourself.
ReplyDeleteThere are numerous choices for printing your work. Your benefactors will request quality and you'll need to furnish them with this. Therefore, your prints should fulfill the business guideline. The best methodology is to give Giclée prints. Giclée (articulated "zhee-mud") is a course of printing that guarantees a significant degree of life span and quality to the print. It is likewise exceptionally "valid" to the first masterpiece.
ReplyDeleteIt helps the paint stick. Liquid clear is great for black or grey canvases, it does the same thing except there is no color. The Gesso's (water-based) are use to prime the canvas. website
ReplyDeleteIt's encouraging to see that some individuals are still making an effort to manage their websites. I'll make sure to check back in shortly. It's just wonderful.brown leather jacket
ReplyDeletethis post is very valuable. Thanks for great information. I appreciate you to hard work and uploading more articles. Power Book III Lou-Lou Shearling Jacket
ReplyDeleteEspecially in the season of snowfall. You feel comfortable when you wear something good like a Marlboro Man Shearling Fur Brown Jacket. Marlboro Man Jacket
ReplyDeleteThis post is very valuable. Thanks for great information. I appreciate you to hard work and uploading more articles
ReplyDeletericky bobby jacket
Especially in the season of snowfall. You feel comfortable when you wear something good like a Marlboro Man Shearling Fur Brown Jacket.
ReplyDeletericky bobby jacket
This comment has been removed by the author.
ReplyDeleteThis comment has been removed by the author.
ReplyDeleteYour article is such an informative article. It is glad to read such those articles thanks for sharing. akatsuki puffer jacket
ReplyDeleteOur the purpose is to share the reviews about the latest Jackets,Coats and Vests also share the related Movies,Gaming, Casual,Faux Leather and Leather materials available. Blind For Love J Hope Varsity Jacket
ReplyDelete
ReplyDeleteThanks for your marvelous posting! I certainly enjoyed reading among us jackets
it, you might be a great author. I will ensure that I bookmark your blog
and will come back from now on. I want to encourage you continue
your great writing, have a nice holiday weekend!
Your blog provided us with valuable information to work with. Each &every tip of your post is awesome. Thanks a lot for sharing. Keep blogging.
ReplyDeletename badge printing
Wow, cool post. I'd like to write like this too - taking time and real hard work to make a great article... but I put things off too much and never seem to get started. Thanks though. Satta king online
ReplyDeleteSuch a beautiful article. If you want to know more about my pdf editor for android users then you should go and check it.pdf editor for android Solve your pdf problems.
ReplyDeleteOn that website page, you'll see your description, why not read through this. https://www.frclothing.co/
ReplyDeleteIn this article understand the most important thing, the item will give you a keyword rich link a great useful website page: rio branco
ReplyDeleteI am really happy to say it’s an interesting post to read . I learn new information from your article , you are doing a great job . Keep it up Cobra Kai Jacket
ReplyDeleteI have read all the comments and suggestions posted by the visitors for this article are very fine,We will wait for your next article so only.Thanks! custom diamond painting
ReplyDeletehttps://highlandelectronics.net/
ReplyDeleteWe are famous among the best electronics online store, especially when you Buy Playstation Online, Xbox for sale, Apple
phone accessories and more.
https://highlandelectronics.net/
text/whatsapp : +1(702) 637-0962
Buy Canaan Avalon Miner 1166 Pro
Canaan Avalon Miner 1166 Pro
Buy Antminer Z15 420sol/s
Antminer Z15 420sol/s
IPad Pro 12.9-inch for sale
Buy IPad Pro 12.9-inch online
Buy STM Charge Tree Swing online
Order STM Charge Tree Swing
Apple iPhone 13 Pro Max Gold for sale
Apple iPhone 13 Pro Max Gold
Apple iPhone 13 Pro 128GB Gold for sale
Buy Apple iPhone 13 Pro Gold
Buy Apple Watch Series 7 Online
Apple Watch Series 7 for sale
Buy iPhone 13 Pro Max online
iPhone 13 Pro Max for sale online
Buy iPhone 13 Pro online
iPhone 13 Pro for sale
order iPhone 13 pro
iPhone 13 for sale online
Buy iPhone 13 online
Order iPhone 13 online
Buy iPad Air 10.9-inch Online
iPad Air 10.9-inch for sale
Buy MacBook Air 13-inch Online
MacBook Air 13-inch for sale
Wholesale MacBook Pro 13 online
Buy MacBook Pro 13 online
Buy ASUS Chromebook Flip C434 Online
ASUS Chromebook Flip C434
Buy Amazon Fire TV Stick 4K Online
Notice the feelings you get looking at the painting, the general impression produced by the entire painting and its elements - later you will dig deeper to understand what inspired those emotions. Portrait malen lassen
ReplyDeleteShop this best Super quality Stargirl Starman Leather Costume Jacket For Men SHOP NOW
ReplyDeleteNice Post...
ReplyDeleteLatest Funny Video
Archaeological Survey of India Janva jevu Gujaratima Tajmahal
Premsukh Delu IPS: gujctoc accused yashpal jashpal property seal Jayesh patel Jamnagar News
This is a very nice blog and learned more knowledge to read this post thanks for sharing this informative post shopstreetwears
ReplyDelete
ReplyDeleteThis is a very nice blog and learned more knowledge to read this post thanks for sharing this informative post.
shophoodies.co.uk
ReplyDeleteI like your blog because it is so informative. I learned a lot from your post thank you.
shophoodies.co.uk
This is a great post and I enjoy the look of your blog very much. Thanks for sharing
ReplyDeleteGreat Post & Thanks for sharing.
ReplyDeleteWe offers Alibaba Services and Web Design & Development Sialkot Visit us.
Alibaba Official Partner In Sialkot
SEO Services in Lahore & Sialkot
Best Pakistan Logo Design Company Sialkot
Domain & Web Hosting in Sialkot
Web Xperts Portfolio
Web Development Services
Alibaba Service Provider
nice article. thanks for sharing
ReplyDeleteGet Leather Jackets with free shipping worldwide. Visit Us today.
A2 Flight Jacket Mens
Leather V-Bomber Jacket Men
Mens Leather Bomber Jackets
Biker Leather Jacket Mens
Fashion Jackets Mens for Sale
BrilliantcontentI haveeverseenThanksfor sharing thiswonderfulinformation.
ReplyDeleteShop this best Super quality Yellowstone Quilted Jacket SHOP NOW
ReplyDeleteThis article is really amazing. blackfriday discount The material in this post is wonderful blackfryday sale and helpful.
ReplyDeleteThanks for one marvelous posting! I really enjoyed reading it, you might be a great author. I will be sure to bookmark your blog. but nowadays it is likely that many people will want to travel to distant and dangerous places. Whether you are planning a holiday in Europe using the Best High-Speed
ReplyDeleteVPN for traveling is an essential step in ensuring your safety and privacy.
Diamond painting is a new type of art that allows you to create stunning pieces of art with ease. This creative activity allows you to make intricate and beautiful designs by placing small "diamonds" onto a canvas, similar to the way paint would be used in traditional painting.
ReplyDeleteShop this best quality The Boys Billy Butcher Trench Coat SHOP NOW....
ReplyDeleteI'd like to thank you for communicating your knowledge and expertise in writing these posts. Your work has been a very valuable asset for our readers. Black Label Society vest
ReplyDeleteNonetheless, many individuals accept that Theoretical Art is significant and significant in that it assists them with communicating sentiments and needs without expecting to communicate any thoughts such that traditional art can't. designs for additive manufacturing
ReplyDeletePainting trim is ordinarily finished by roller and brush, not showered, so more physical work is required painting trim, and most cases costing 60% of the absolute outside painting position. painter new braunfels
ReplyDeletehttp://www.observedimpulse.com/2015/03/myofascial-release-for-face-composure.html?sc=1679293228156#c4794480312865820936
ReplyDeleteThe style of the artist or author will shout to the consideration of well off supporters, the admiration of companions, and the select reverence of the music appreciator. 360 video booth dallas texas
ReplyDeleteIt’s actually a great and useful piece of information. I am happy that you simply shared this useful information with
ReplyDeleteus. Please stay us informed like this. Thanks for sharing. Beth Dutton Pendleton Jacket
To make a painting from a print, you will need some basic supplies such as paint, paintbrushes, canvas, and a print of the image you want to recreate.
ReplyDeleteFor more visit! top gun green jacket
If you need help with any step of the process or further guidance on materials and techniques, don't hesitate to reach out to your local art supply store or Couponfollowers, a leading expert in art supplies and creative solutions. They can provide valuable advice and recommendations tailored to your specific needs, ensuring a successful and enjoyable transformation of your print into a one-of-a-kind painting.
ReplyDeleteReally fantastic and amazing article that gives me exact information that I needed. https://marketguest.com/construction-managers-should-not-skip-on-the-job-training-tool/
ReplyDeleteThe drywall contractor handled the project with professionalism and expertise. drywall contractor
ReplyDeleteAdorn yourself with the Penny Benjamin Jacket and step into a world of unparalleled confidence. The carefully chosen fabrics and impeccable stitching offer a flawless fit that empowers you to embrace your unique style and stride with assurance.
ReplyDeleteThis is a good post, it teach me many things. Thank for your share!
ReplyDeletePainting West Palm Beach
Feeling like a true member of the Akatsuki in this awesome Naruto Akatsuki Puffer Jacket
ReplyDeleteWrap up in team spirit with the England Lionesses Puffer Jacket perfect for game day and beyond.
ReplyDeleteBut I must say that it is debate that change things. Anyway, very good article, thanks for the share....
ReplyDelete8 Ball Leather Jacket
Winter is just around the corner, and that means it's time to update your wardrobe with cozy and stylish outerwear. Among the many options available, the tan shearling jacket women stands out as a timeless and versatile choice.
ReplyDeleteOne of the most remarkable qualities of long leather jackets is their timeless elegance. These jackets have transcended decades and trends, remaining a staple in fashion for both men and women.
ReplyDeleteThe allure of men's distressed leather jackets begins with the meticulous art of distressing. Craftsmen deliberately age the leather, creating a worn-in appearance that exudes character and authenticity. The intentional scuffs, scratches, and faded areas give the jacket a unique personality, as if it has weathered the passage of time, telling its own story.
ReplyDeletegreat and useful piece of information. I am happy that you simply shared this useful information Stiiizy Pineapple Express
ReplyDeleteThis comment has been removed by the author.
ReplyDeletePicture this: You, striding through the city streets, mysterious aura intact. People turn their heads, wondering if you're a hero or an anti-hero. Well, with the Sung Jin Woo Jacket, you're both. It's the ultimate blend of streetwear and fantasy.
ReplyDeletesung jin woo jacket
sdf
ReplyDeleteExplore exquisite leather jackets at the leather merchandise. Your ultimate destination for premium quality jackets that exude style and durability. Visit us now
ReplyDeleteThe intricate design of Damar Hamlin's Super Bowl jacket reflects his dedication to the game and the glory of his team's triumph.
ReplyDeleteSite: Damar Hamlin championship jacket
beth dutton purse from Yellowstone JacketCo is a Western-inspired masterpiece! The craftsmanship and attention to detail are impeccable, capturing her fierce and independent persona flawlessly
ReplyDeleteThankyou for this Karen Smith Costume.
ReplyDeleteThankyou
ReplyDeleteThanks for this
ReplyDeleteThankx
ReplyDeleteThankx for it
ReplyDeleteThe Wonder Bread Racing Jacket is a vibrant, retro-inspired jacket that celebrates the iconic Wonder Bread brand. Featuring bold red, white, and blue colors with the Wonder Bread logo prominently displayed, it captures the essence of classic racing style.
ReplyDeleteThis comment has been removed by the author.
ReplyDeleteThank you for sharing this amazing content it was really helpful and informative keep it up I will surely share this with my friends.
ReplyDeleteLana Del Rey Jacket
Honor service and show your Lions pride with the Detroit Lions Salute To Service Camo 2024 Hoodie. This cameo-styled hoodie blends team loyalty with a tribute to our heroes. Explore this unique piece today at Arsenaljackets.com.
ReplyDeleteThanks for share great information. It’s very helpful for me.
ReplyDeleteThanks for share great information. It’s very helpful for me.
ReplyDeletered leather coat
Lucid dreaming every night would be incredible.
ReplyDeleteMiss Kopy Kat's tutorial on turning prints into stunning paintings is brilliant! Her creativity shines throughout. Bonus: her Stranger Things Jacket adds a cool pop-culture vibe, making this project feel even more fun and nostalgic. Highly recommended.
ReplyDeleteExcellent write-up. Looking forward to more posts like this. Persian Carpets Design
ReplyDeleteThis stylish miles morales sweatshirt features vibrant, comic-inspired graphics, offering a comfortable and trendy look. Made with soft fabric, it’s perfect for fans of Spider-Man and casual wear.
ReplyDeleteI must say, I thought this was a pretty interesting read when it comes to this topic. Liked the material can I get online e stamp paper in delhi
ReplyDeletecan a citizen generate e-stamp paper online in haryana
is gazette notification mandatory for name change
Is it free to make a trademark?
Nice information providing by your article and I would really like to thank for your article it’s really helpful. <a href="https://www.dchica.in/collections/periodunderwear”>period underwear</a>
ReplyDeletehttps://www.dchica.in/collections/period-panties-for-all-teens-girls
#PeriodPanties #PeriodUnderwear #PeriodPantiesforWomen #ReusablePeriodPanties #Periodpanty #PeriodPantyReusable
In need of 24 hour dry cleaners near me? Dry Cleaning Junction is always open to provide fast and reliable cleaning services. With our round-the-clock availability, your clothes are in expert hands, no matter the time.
ReplyDeleteReally enjoyed reading this post! I’ve noticed that mens hooded leather jackets are becoming super popular lately—they offer both style and practicality, especially for cooler weather. Great to see this trend getting the spotlight
ReplyDelete